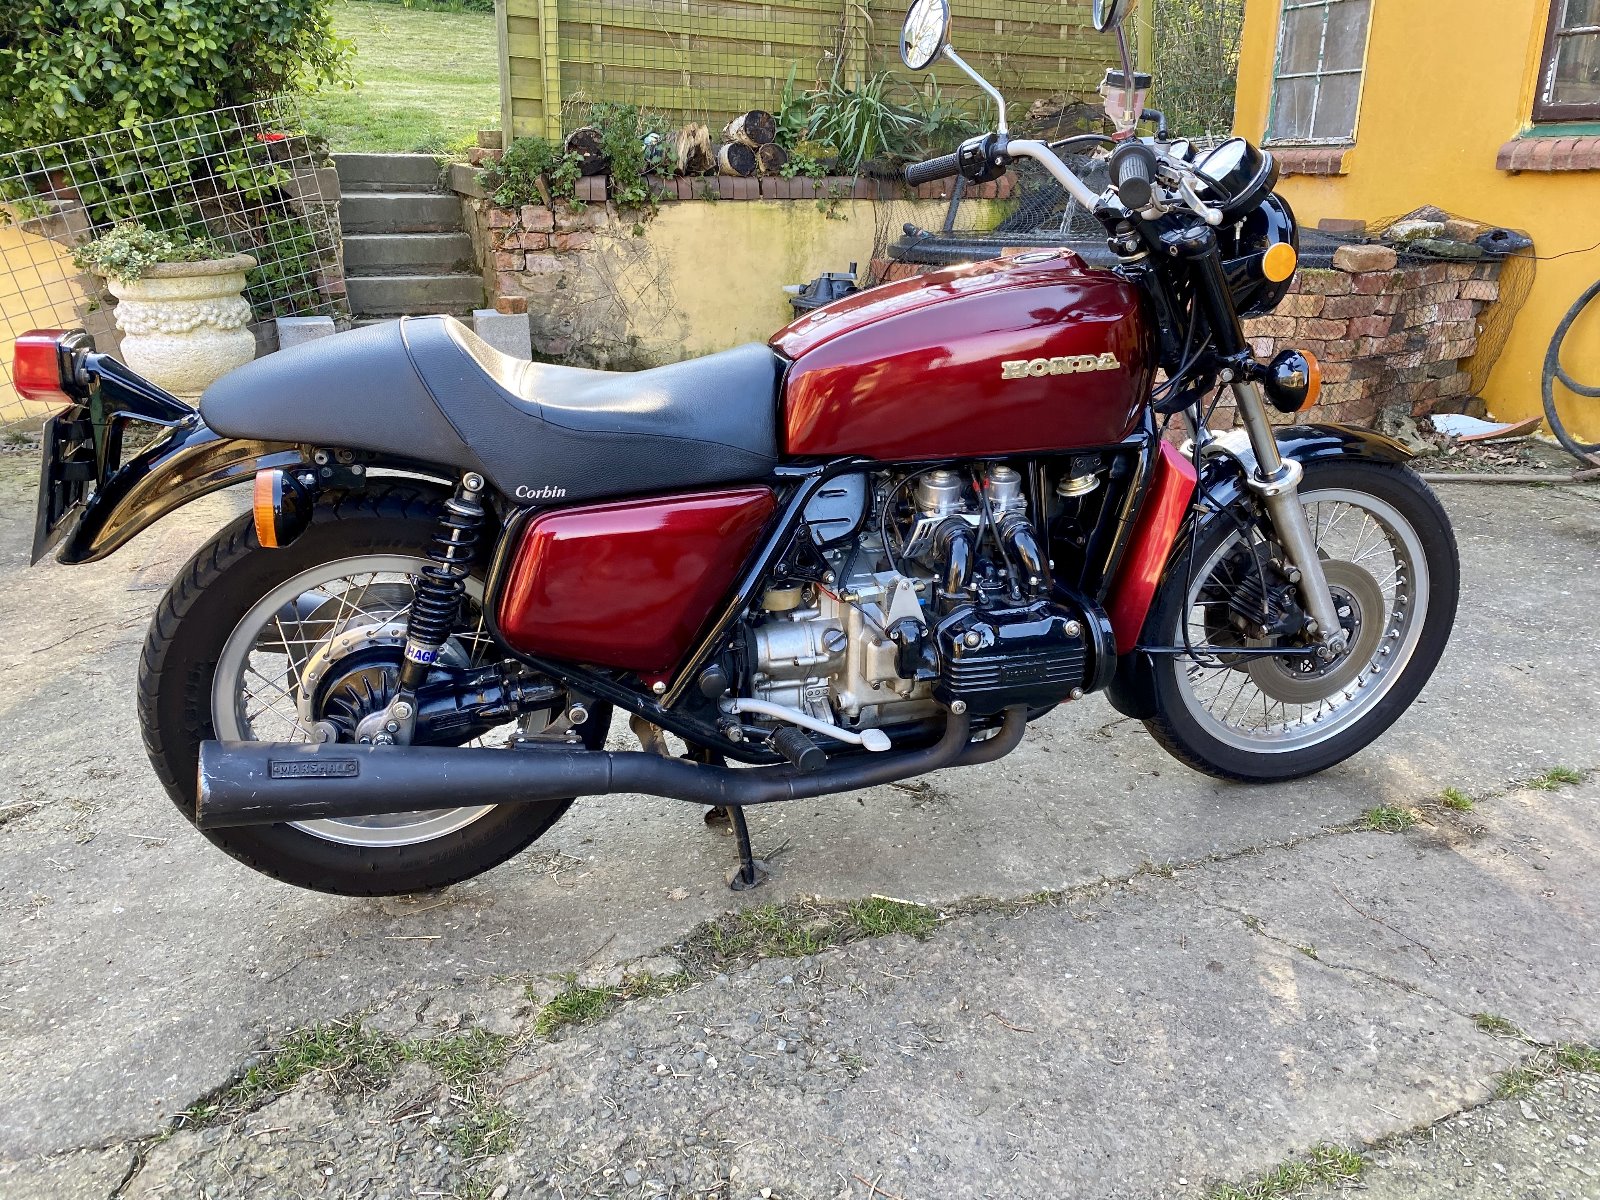
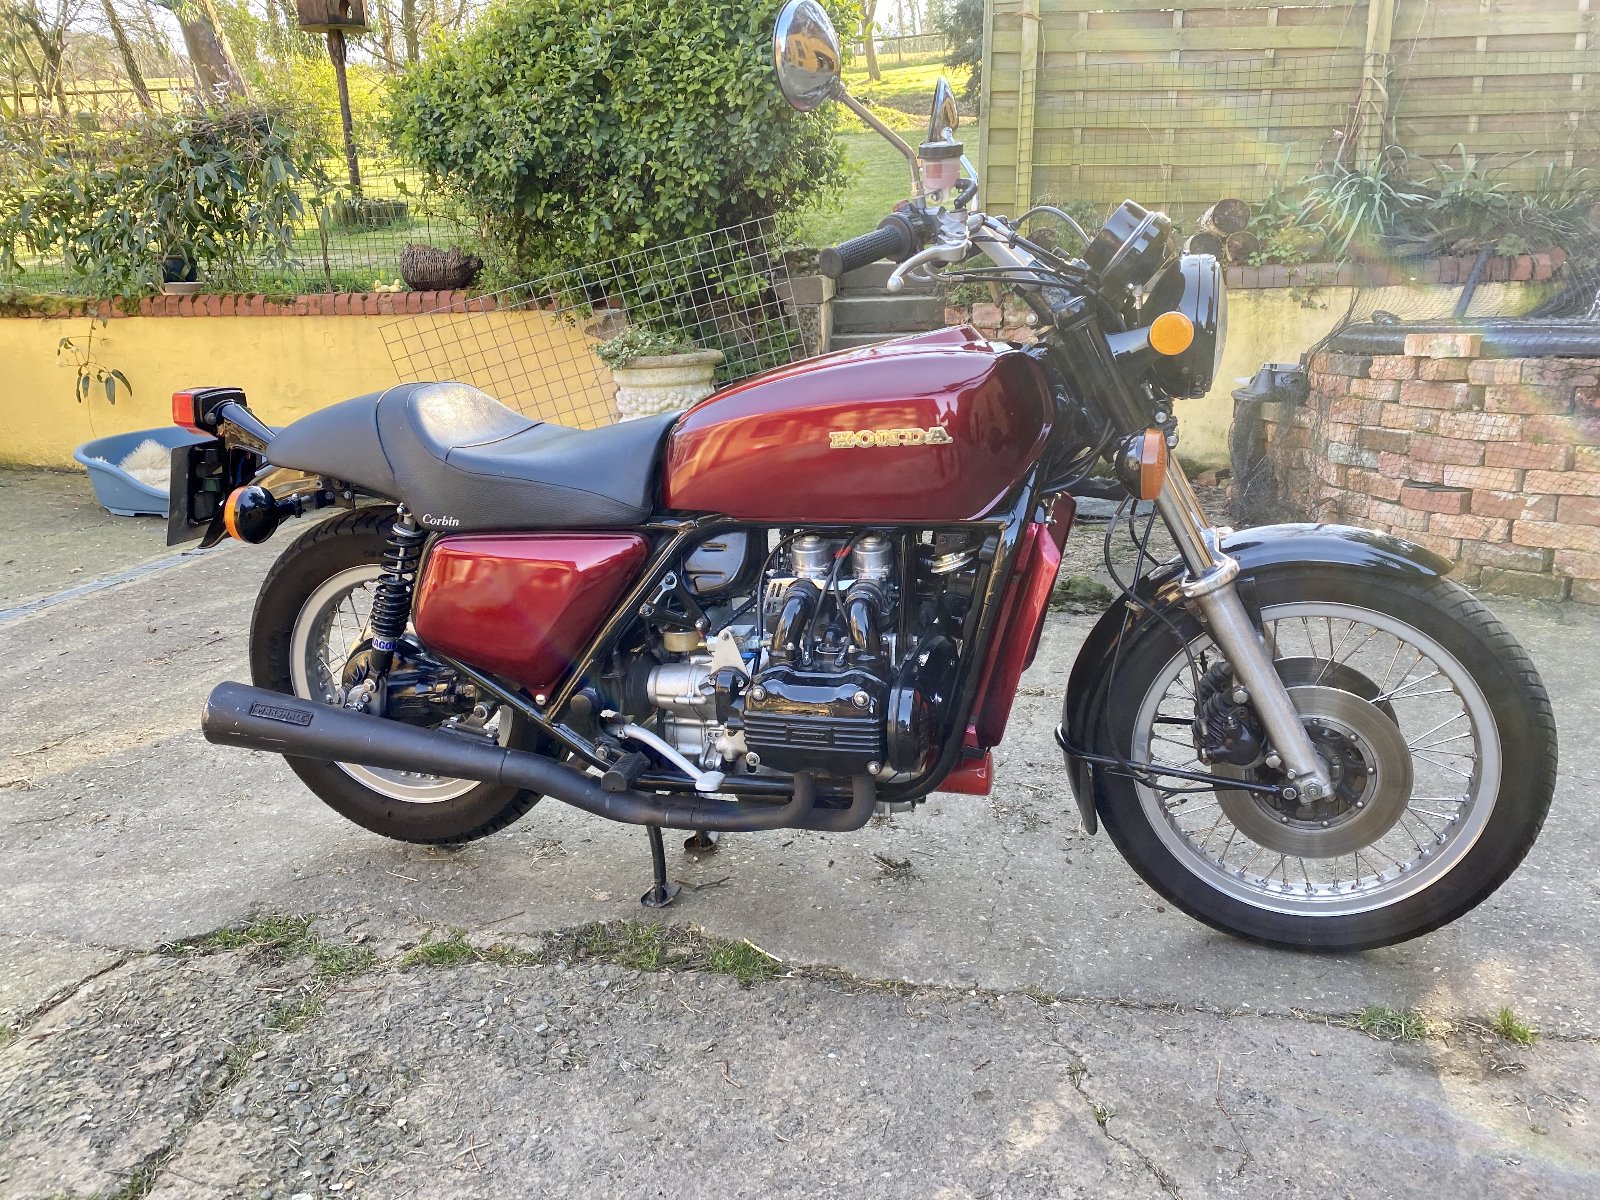
1976 Honda GL1000 Goldwing K2
For Sale

Restored in 2012 from a bike that had been off the road for 7 years. The previous owner had it from new and had stopped riding it when in his 70's. The bike has been completely cosmetically and mechanically restored (except for the engine - which has only been partially restored - more later).

I did not want to do a concours restoration as that didn't interest me. I would describe the restoration as a tasteful modernisation.
The bike willl come with loads of spares (more later) and I will also include an original Honda Workshop Manual (electronic and paper), a Haynes Manual and a photographic record (as pdfs) of the restoration with written commentary on the techniques I used during the restoration - including many 'how to's' and 'tips and tricks'.

The original Goldwings were nakeds. When they first came out they were, despite being radical with their boxer 4 engines, too heavy to compete with the Kawaski Z1 so owners opted to add fairings to create tourers. Honda caught on and the iconic faired Goldwing was born. This bike originally had a huge (and incredibly ugly) aftermarket fairing which I binned to create a custom closer to the original naked bike.

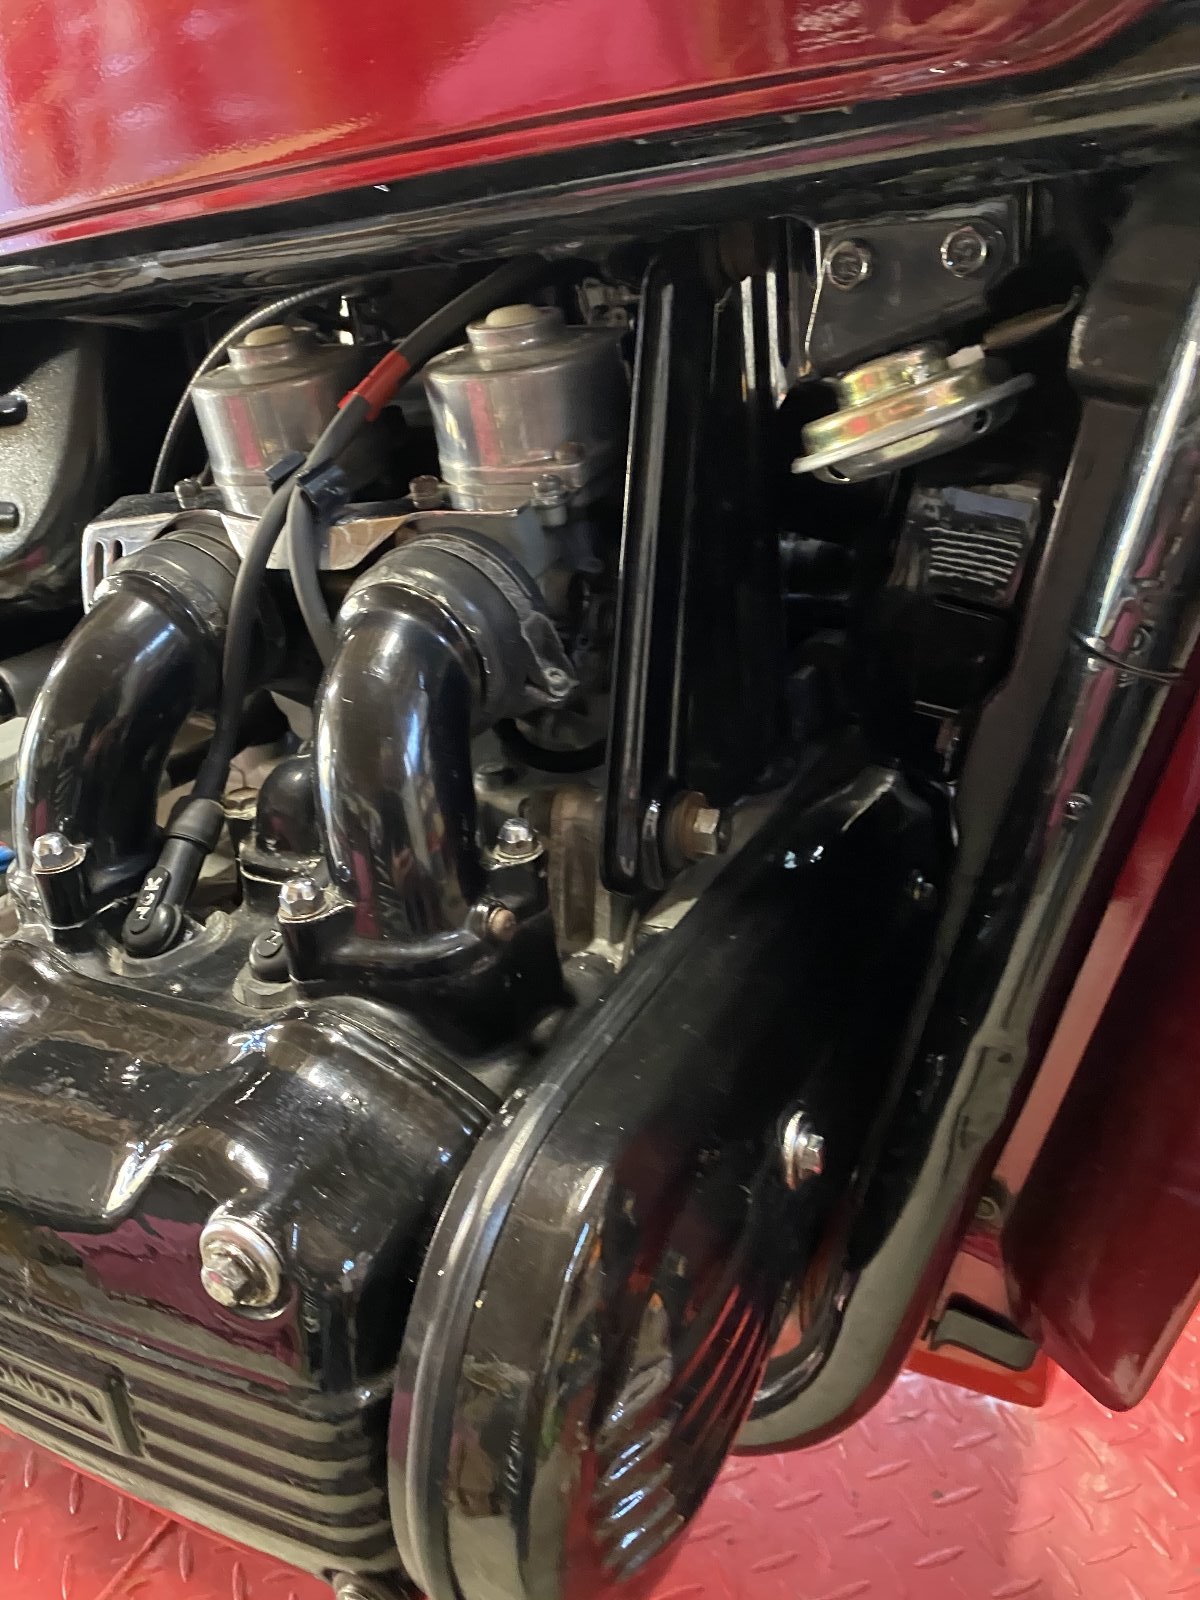
The frame and much of the bodywork is powder-coated black. Re-chroming the original bright work (mudguards etc) was extortionately expensive and not economic for the restoration I had in mind. Tank and side panels were professionally resprayed in the original Honda (Antares) Red. The frame has TIG welded repairs to the cross member that mounts the centre stand (a notorious rust spot) and is injected with waxoyl to kill any further rust. To match the frame the cylinder heads, timing belt covers and carb runners are painted black.

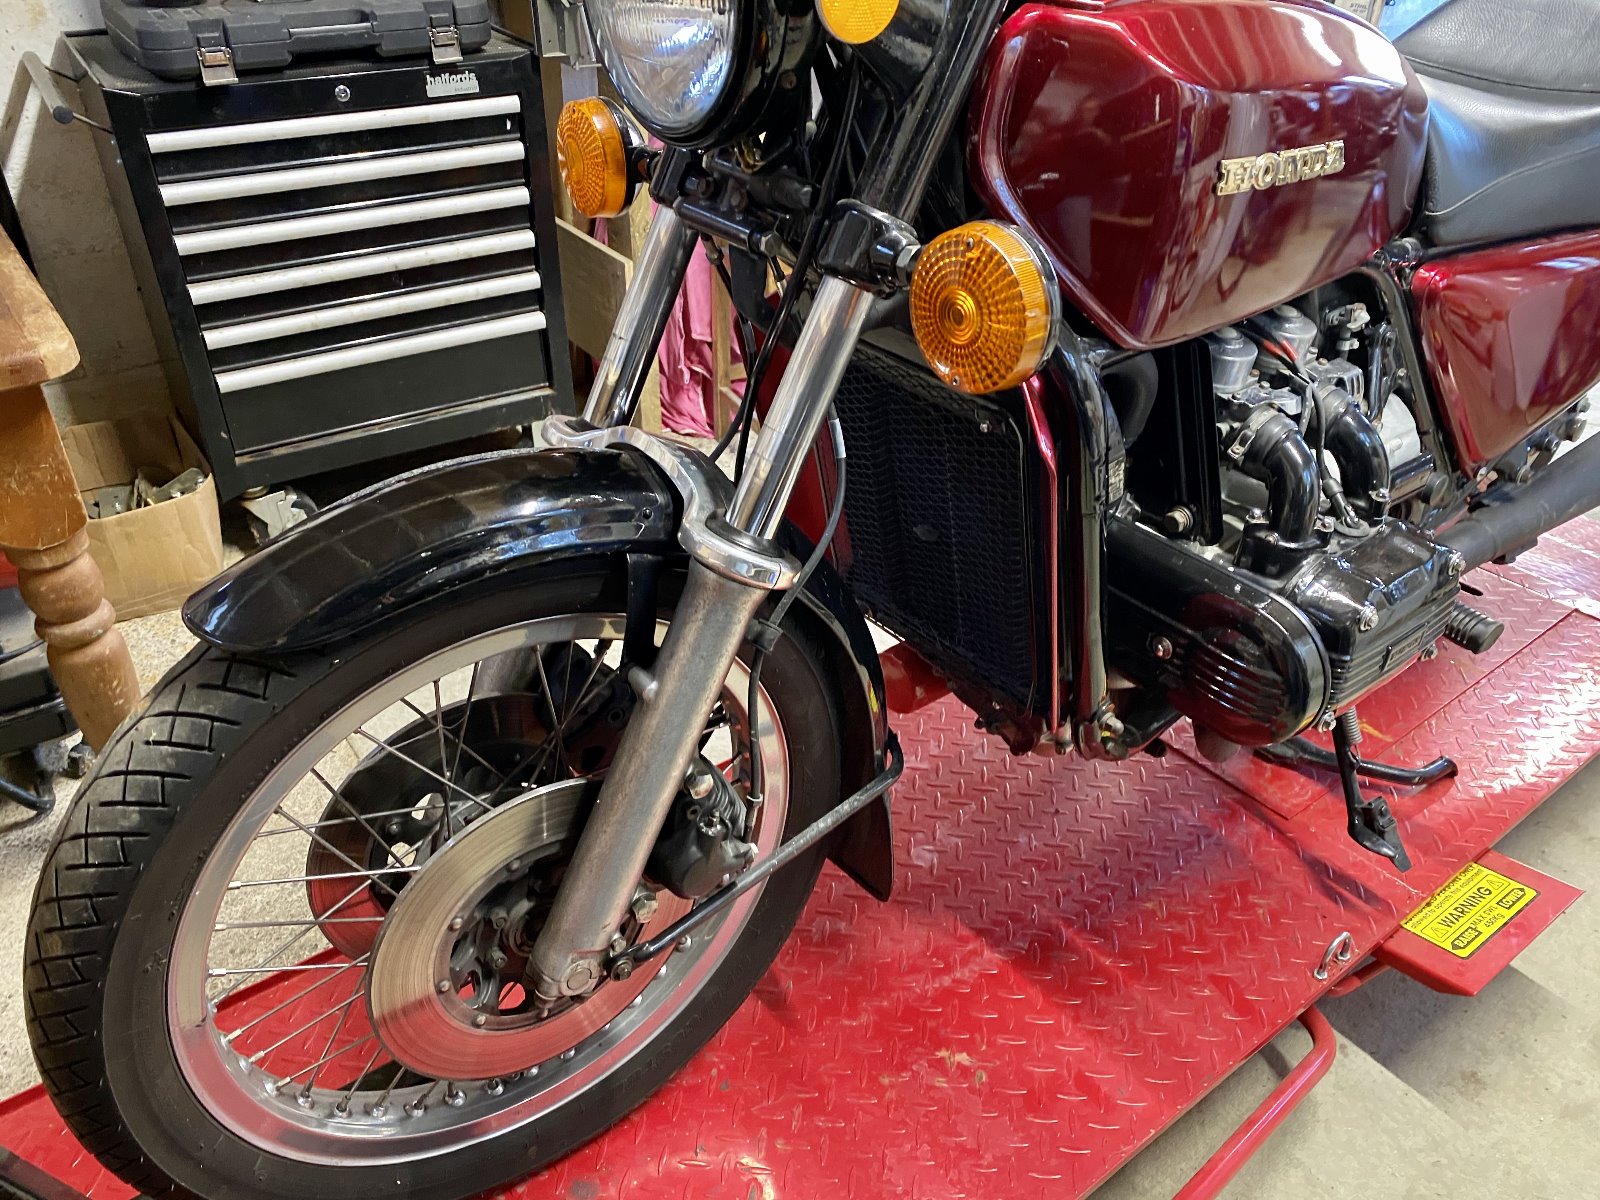
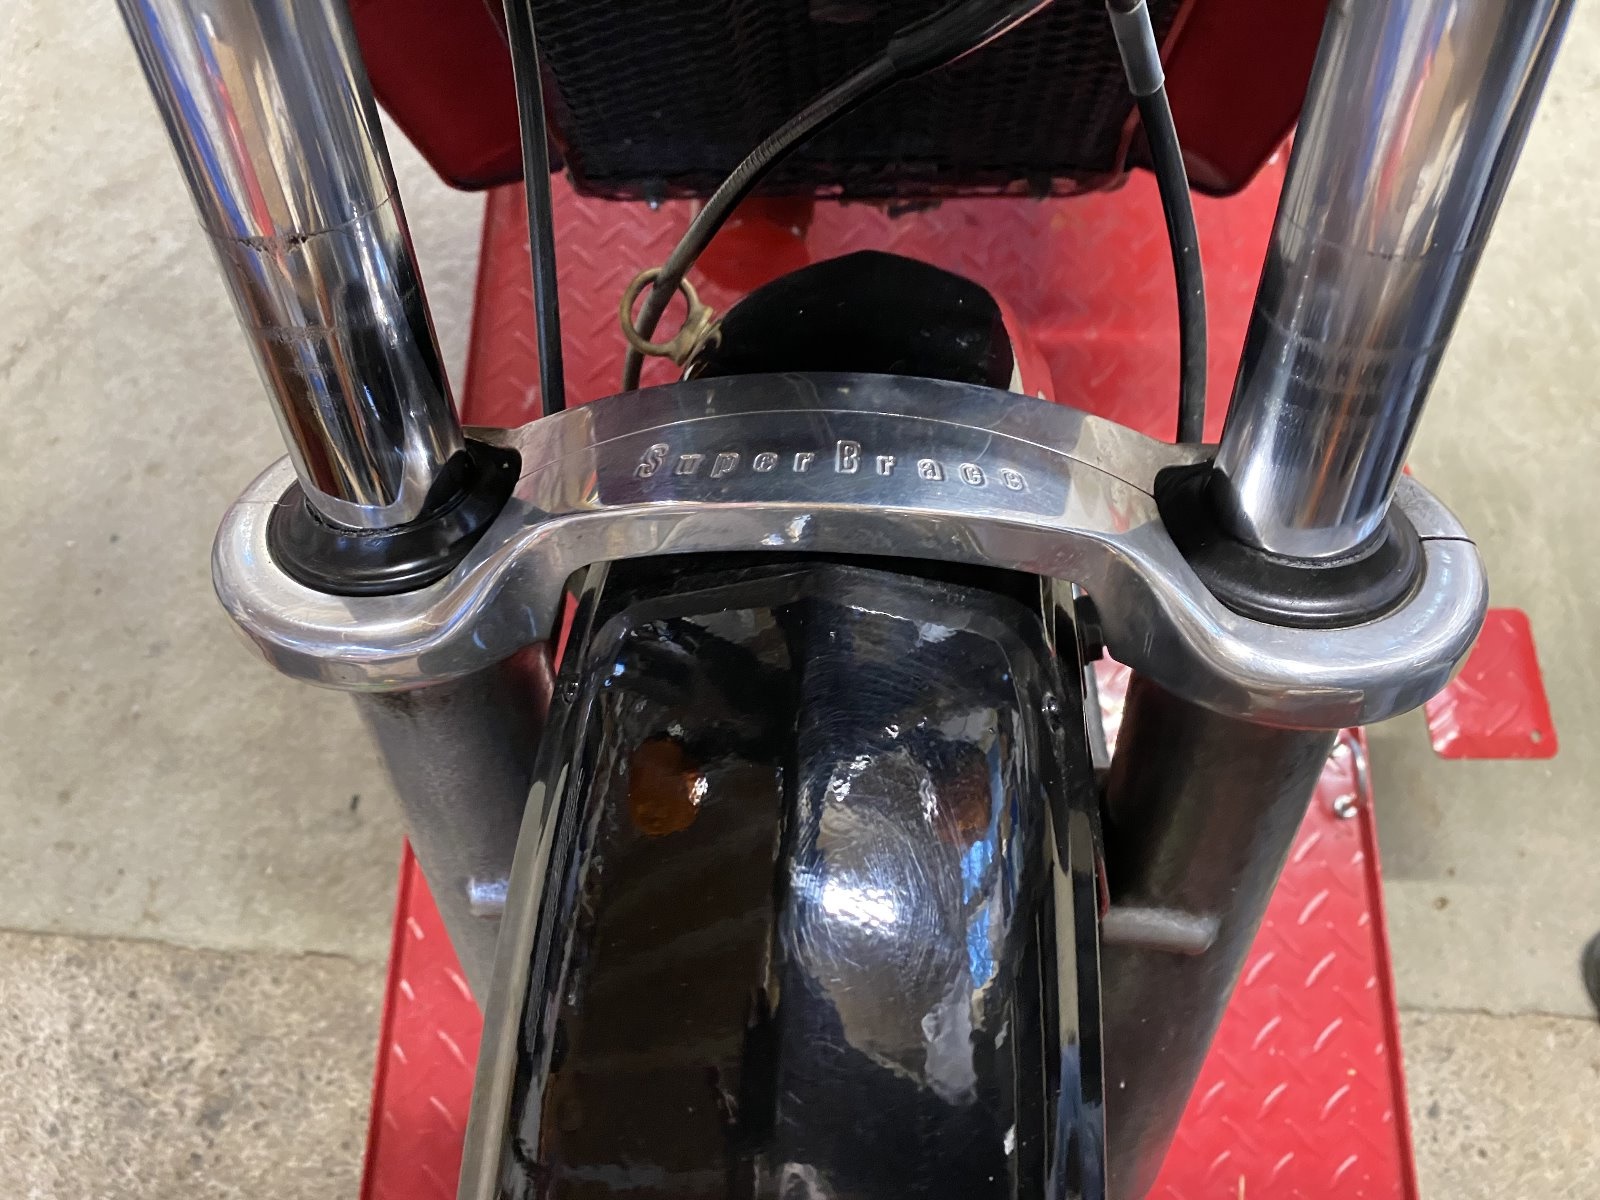
Front and rear mudguards / fenders are powder coated black. The front forks are weedy (typically 1970) and can flex under braking and cornering forces. I have added a 'Superbrace' to the shock uppers (seen just above the fender) and the front end is much more rigid to improve the handling. The shock lower housings could do with restoring - they are ok but not as good as I would like.

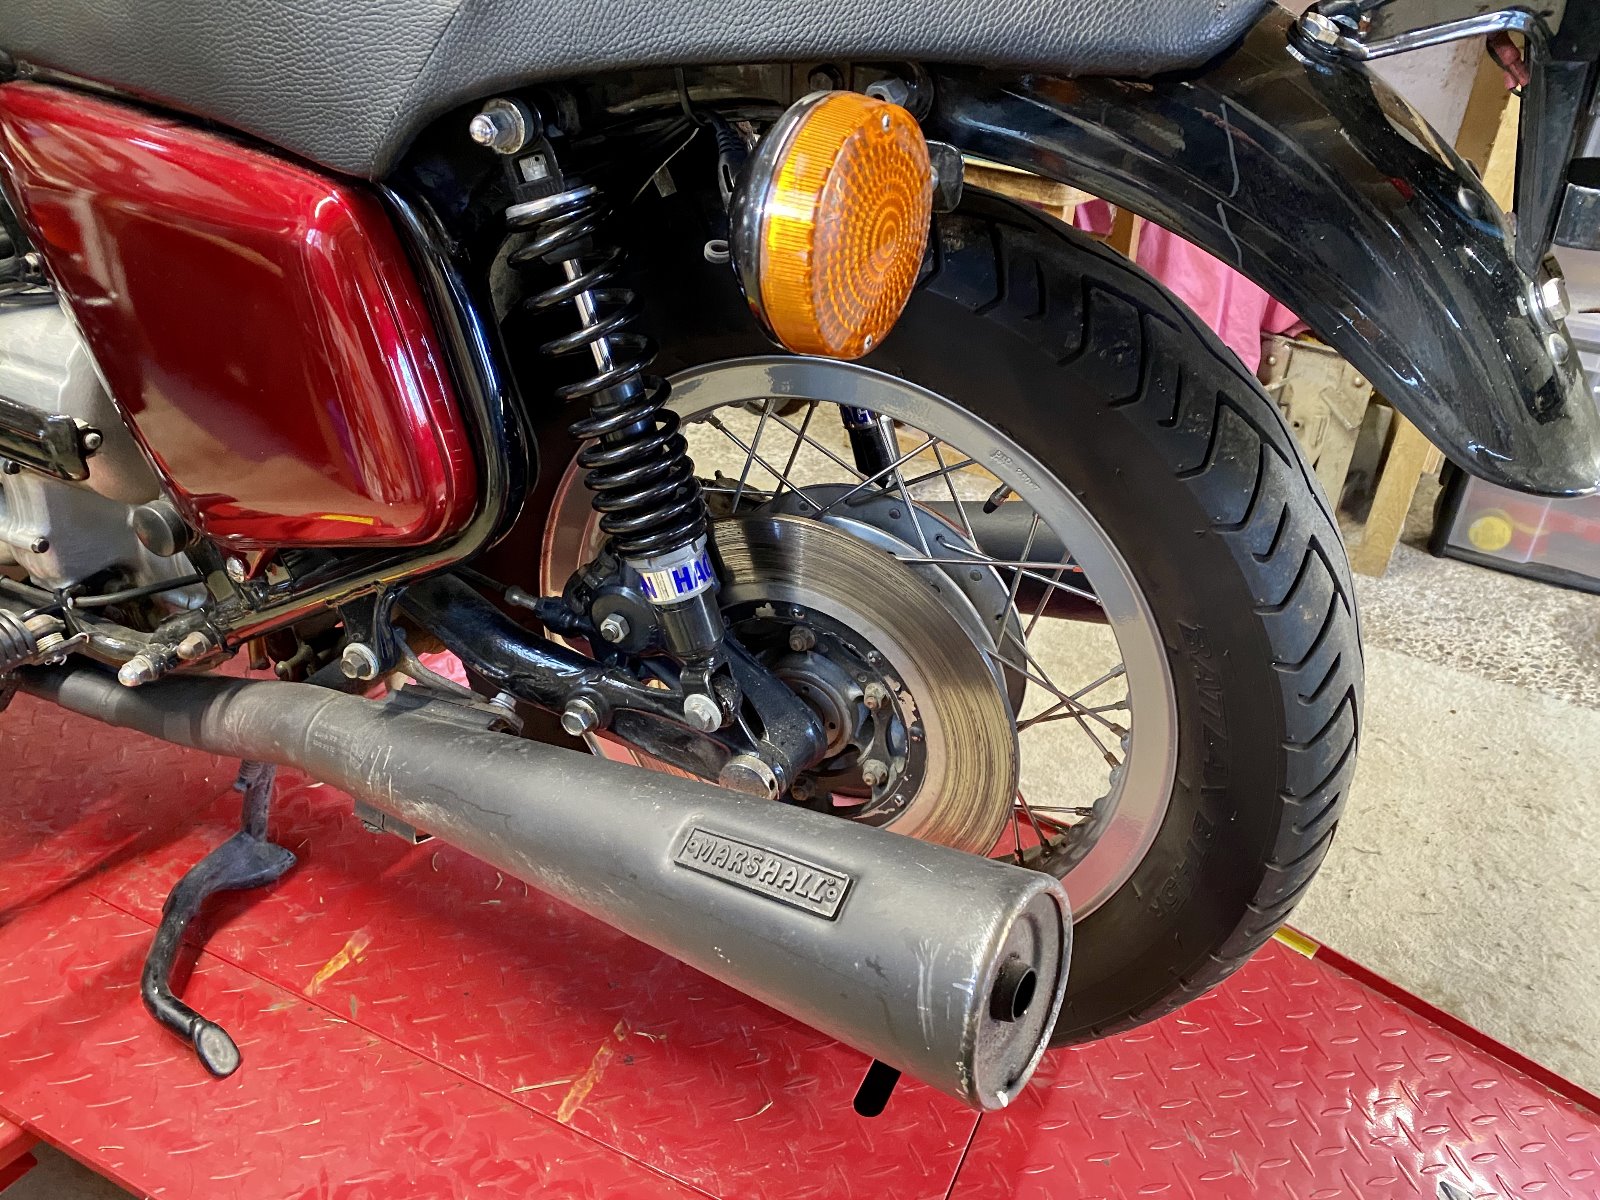
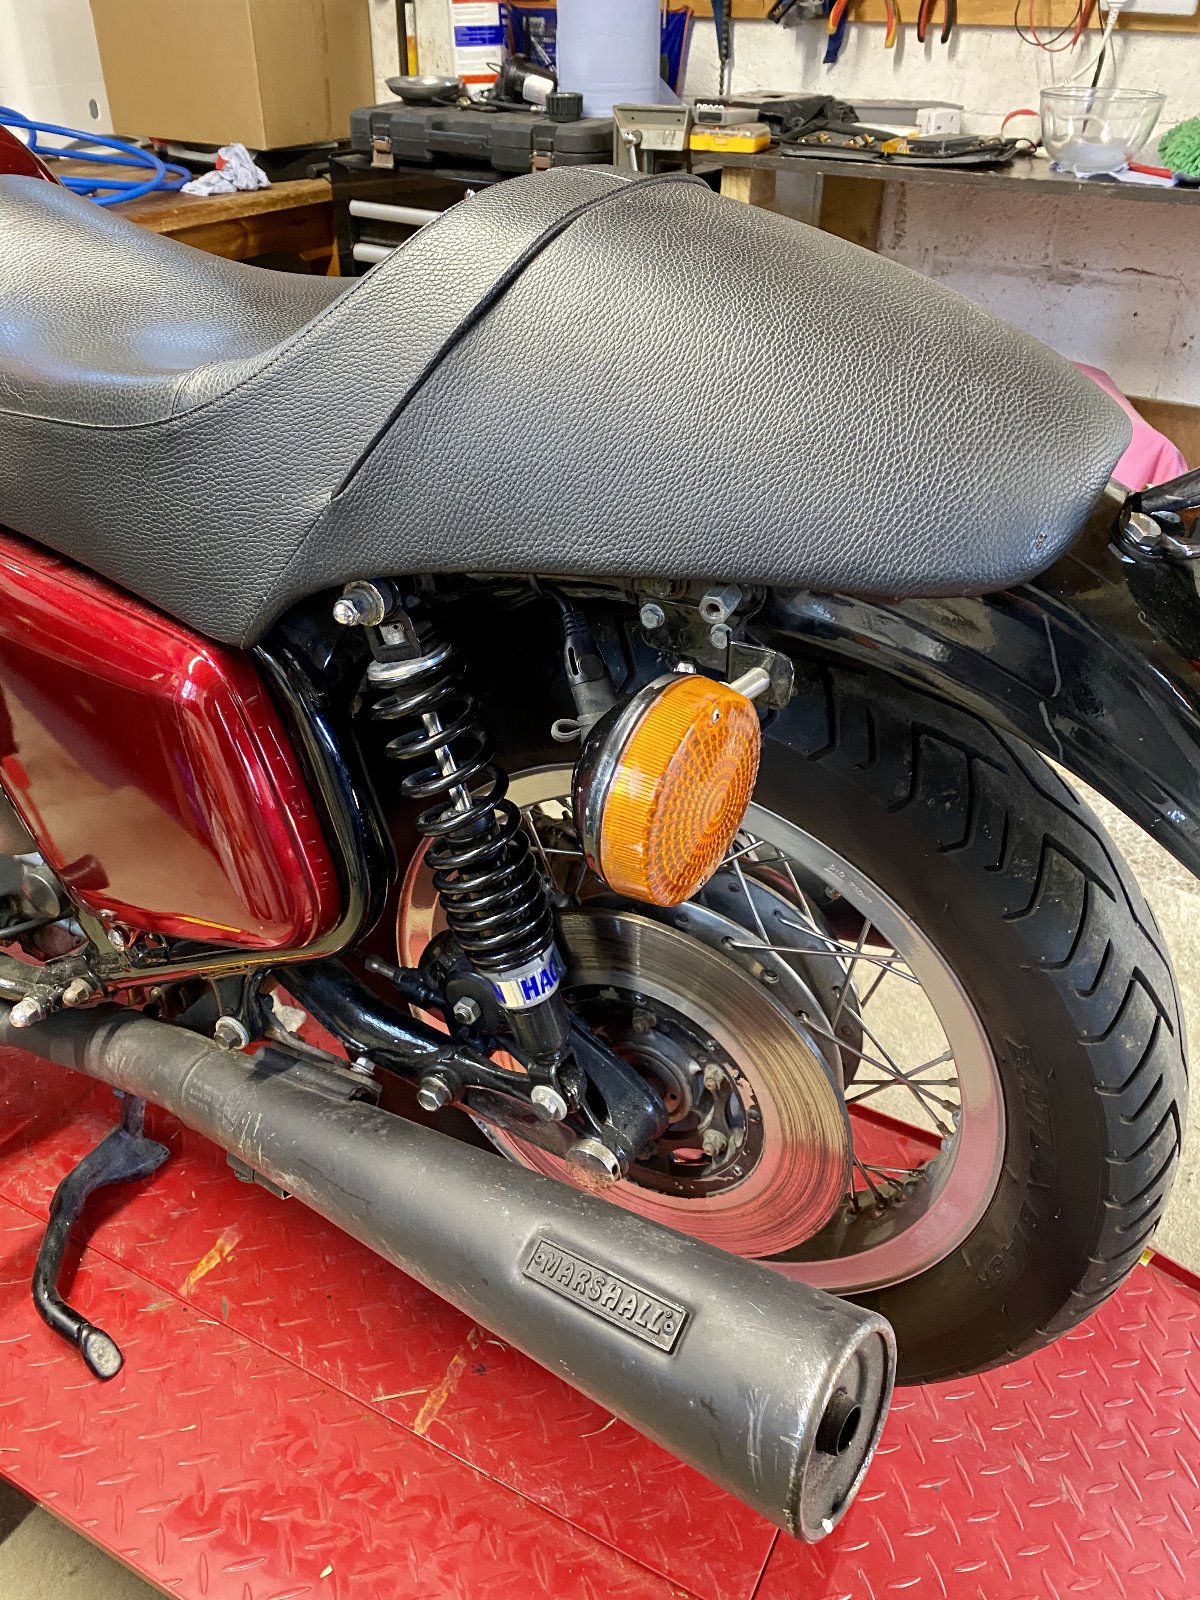
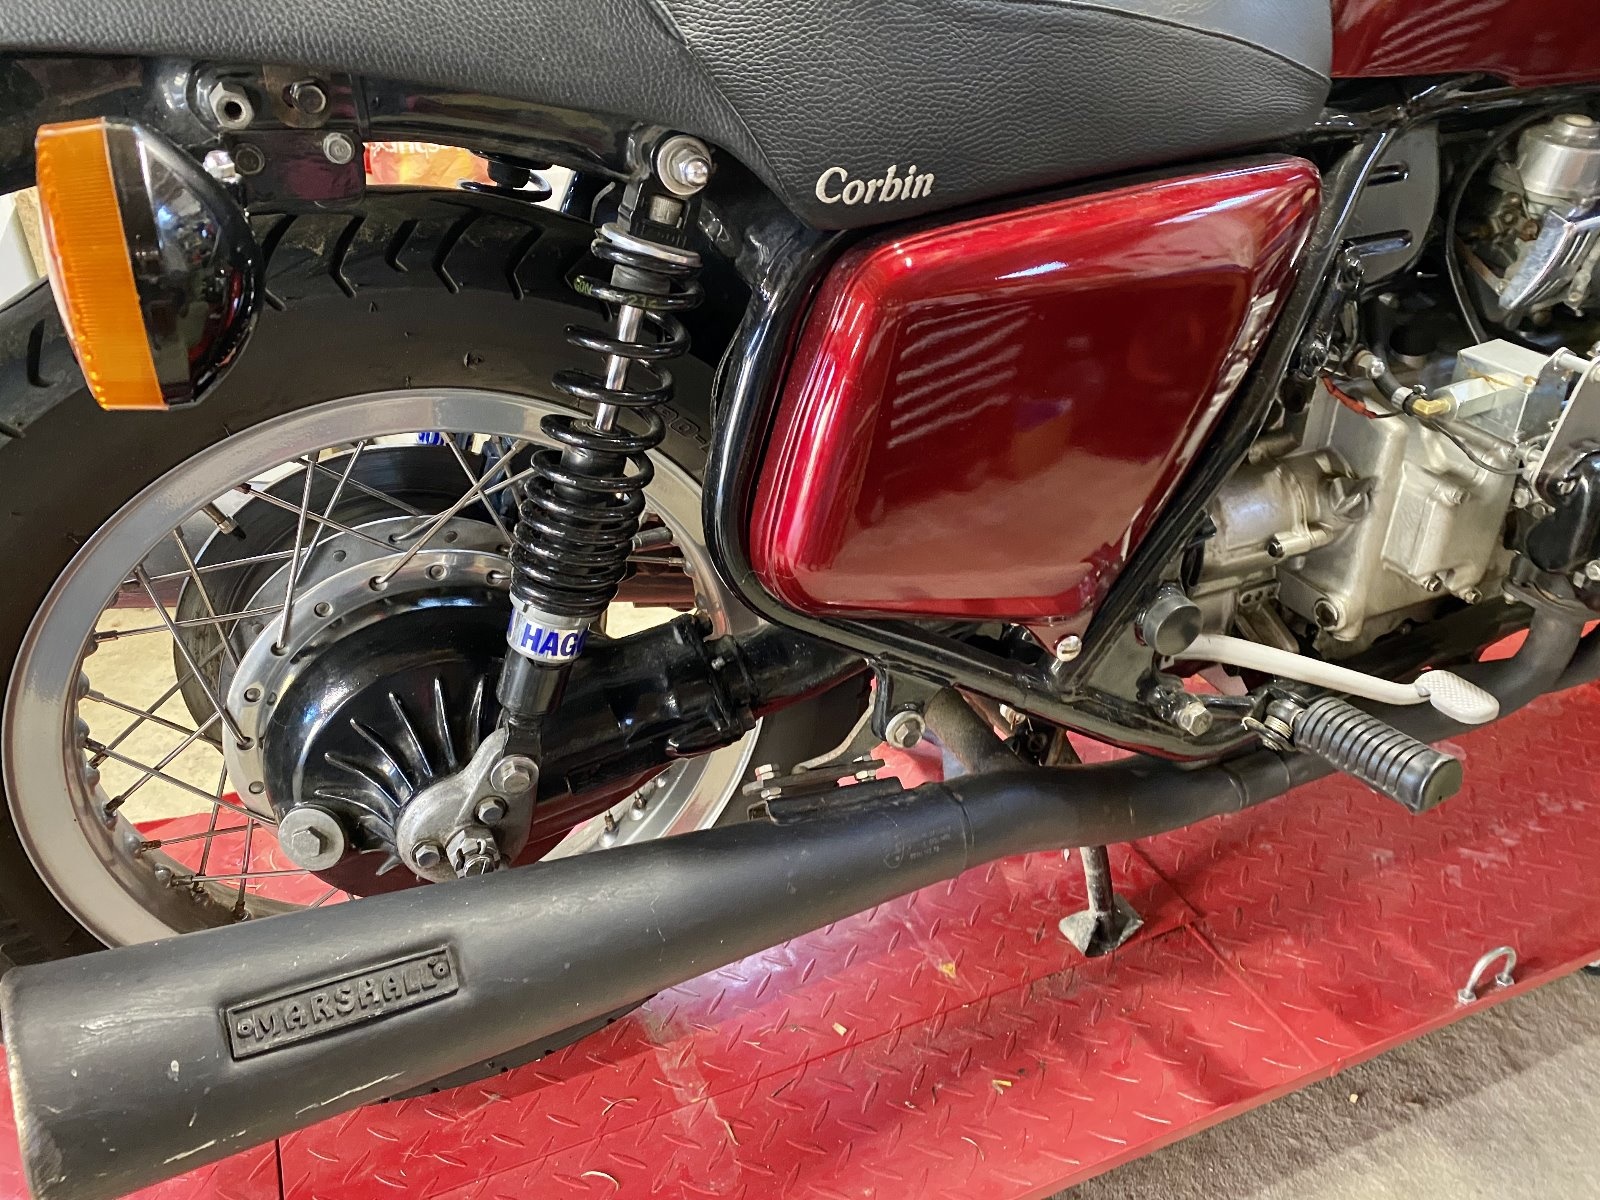
New Hagon Shocks. It took a little bit of experimentation to get the shocks set up correctly. The first set (recommended by Hagon) were too stiff but after trying different springs and tweaking the preload the the ride is now comfortable. A Marshall aftermarket exhaust replaces the original Honda exhaust which would, apparently, disintegrate into a pile of rust overnight! The exhaust sounds good but could do with replacing (more later).

As part of the restoration I stripped the engine and was going to split the block to replace the crank bearing shells. But as I took it apart I measured each moving or consumable part for wear...and there was none! Even the clutch pack disks met as new specs! So the main engine block was left alone. The engine has 68k on it but engines have been reported to achieve 200k with no or little internal work done. I think that Honda were 'over-engineering' their products to ensure they could out-compete their competition on reliability! Just in case I have a spare engine from a 1979 GL1000 (with 27K- so it is relatively youthful) which is included with the bike.
The engine has had the back-end (clutch and chain section) off with everything checked; all gaskets, seals and locking tabs have been replaced. The heads have been off and cleaned. The valves and ports have been cleaned, checked and lapped. All clearances have be reset and the cams flipped and reversed (a trick that zero times them). All the oil pathways and the entire cooling system has been cleaned, flushed and refitted with new seals and gaskets. Effectively everything that could be done without splitting the engine block has been done.

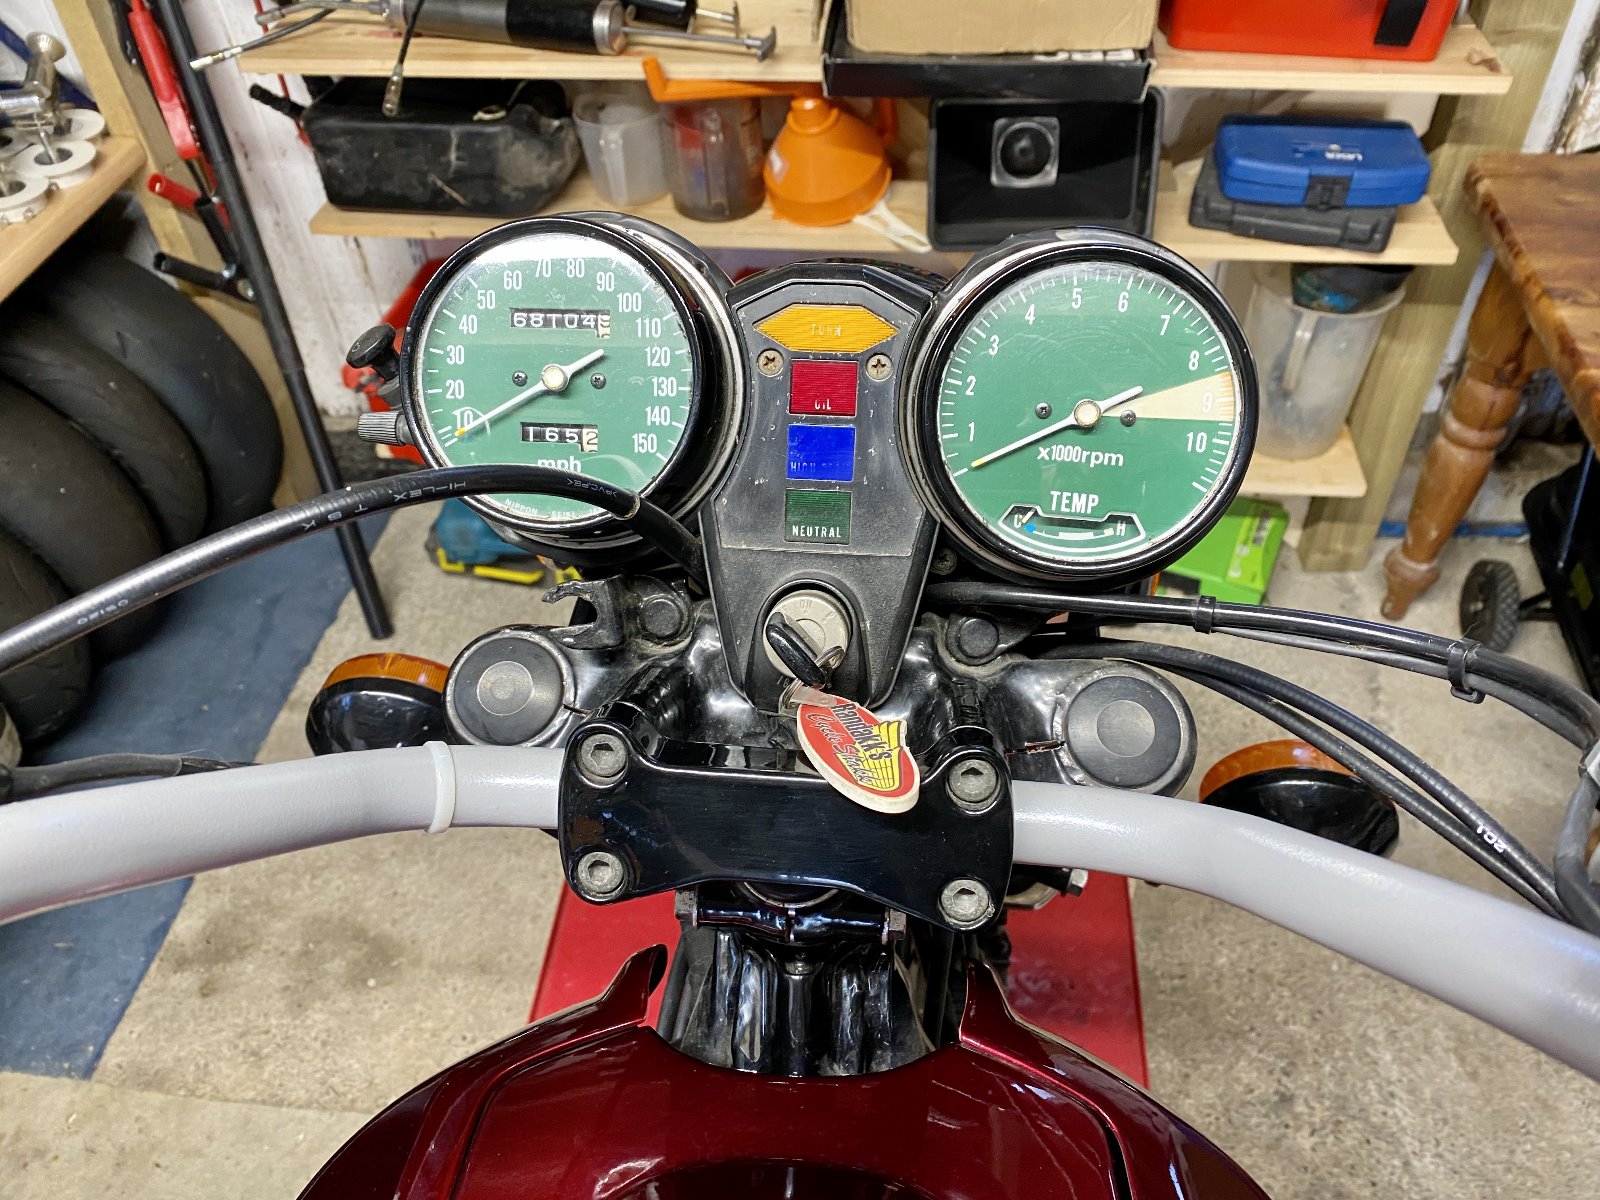
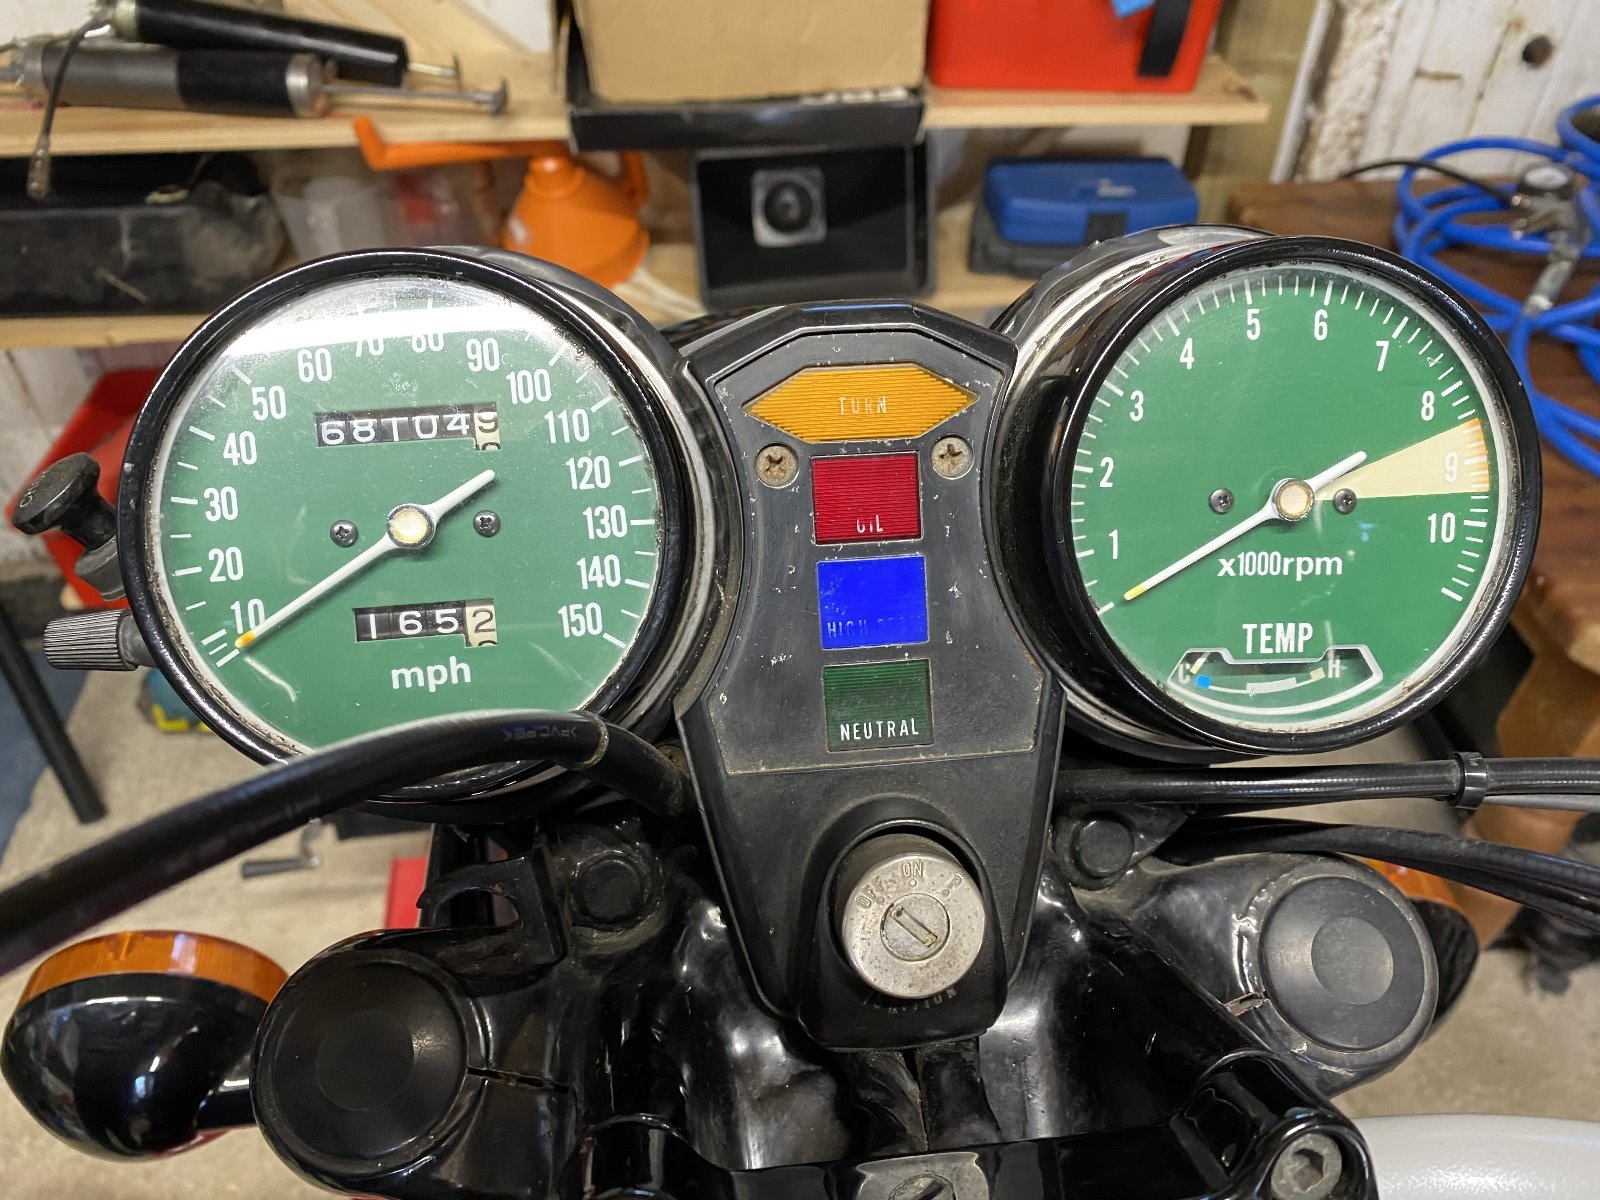
Clocks showing accurate mileage. Confirmed by MOT certificates. Faces are a bit faded (you can get replacement decals) but I liked them as is. Handlebars (like a lot of 1970's stuff) are not as strong as modern kit - so I added a further brace across the top of the handle clamps from the 1979 GL1000 which I bought as a donor bike. All cables have been replaced and brake hoses are braided steel lines. Electrical wires run internally to the bars (as they did on the original bike) which cleans up the look (a bit). Later bikes had a lower rev limit and were carbed and cammed to suit the tourer / cruiser market - the original Goldwing (like this one) was supposed to be a sports bike.

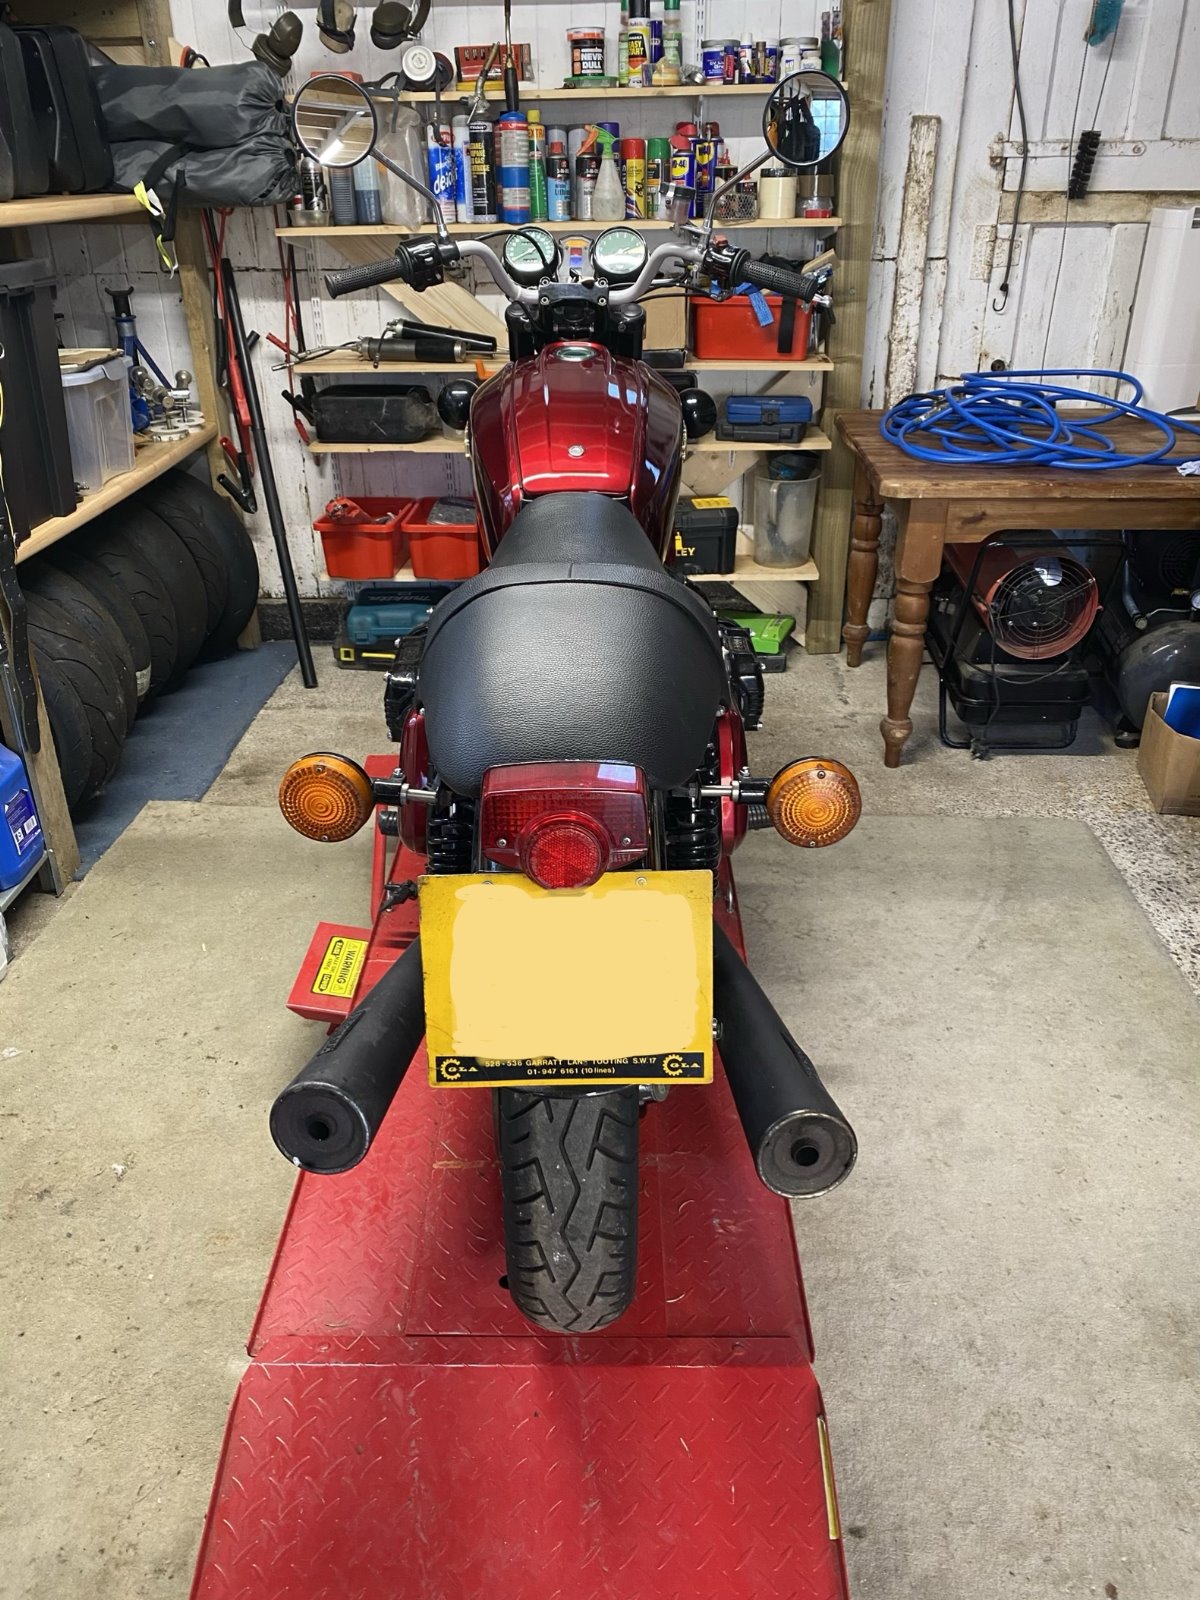
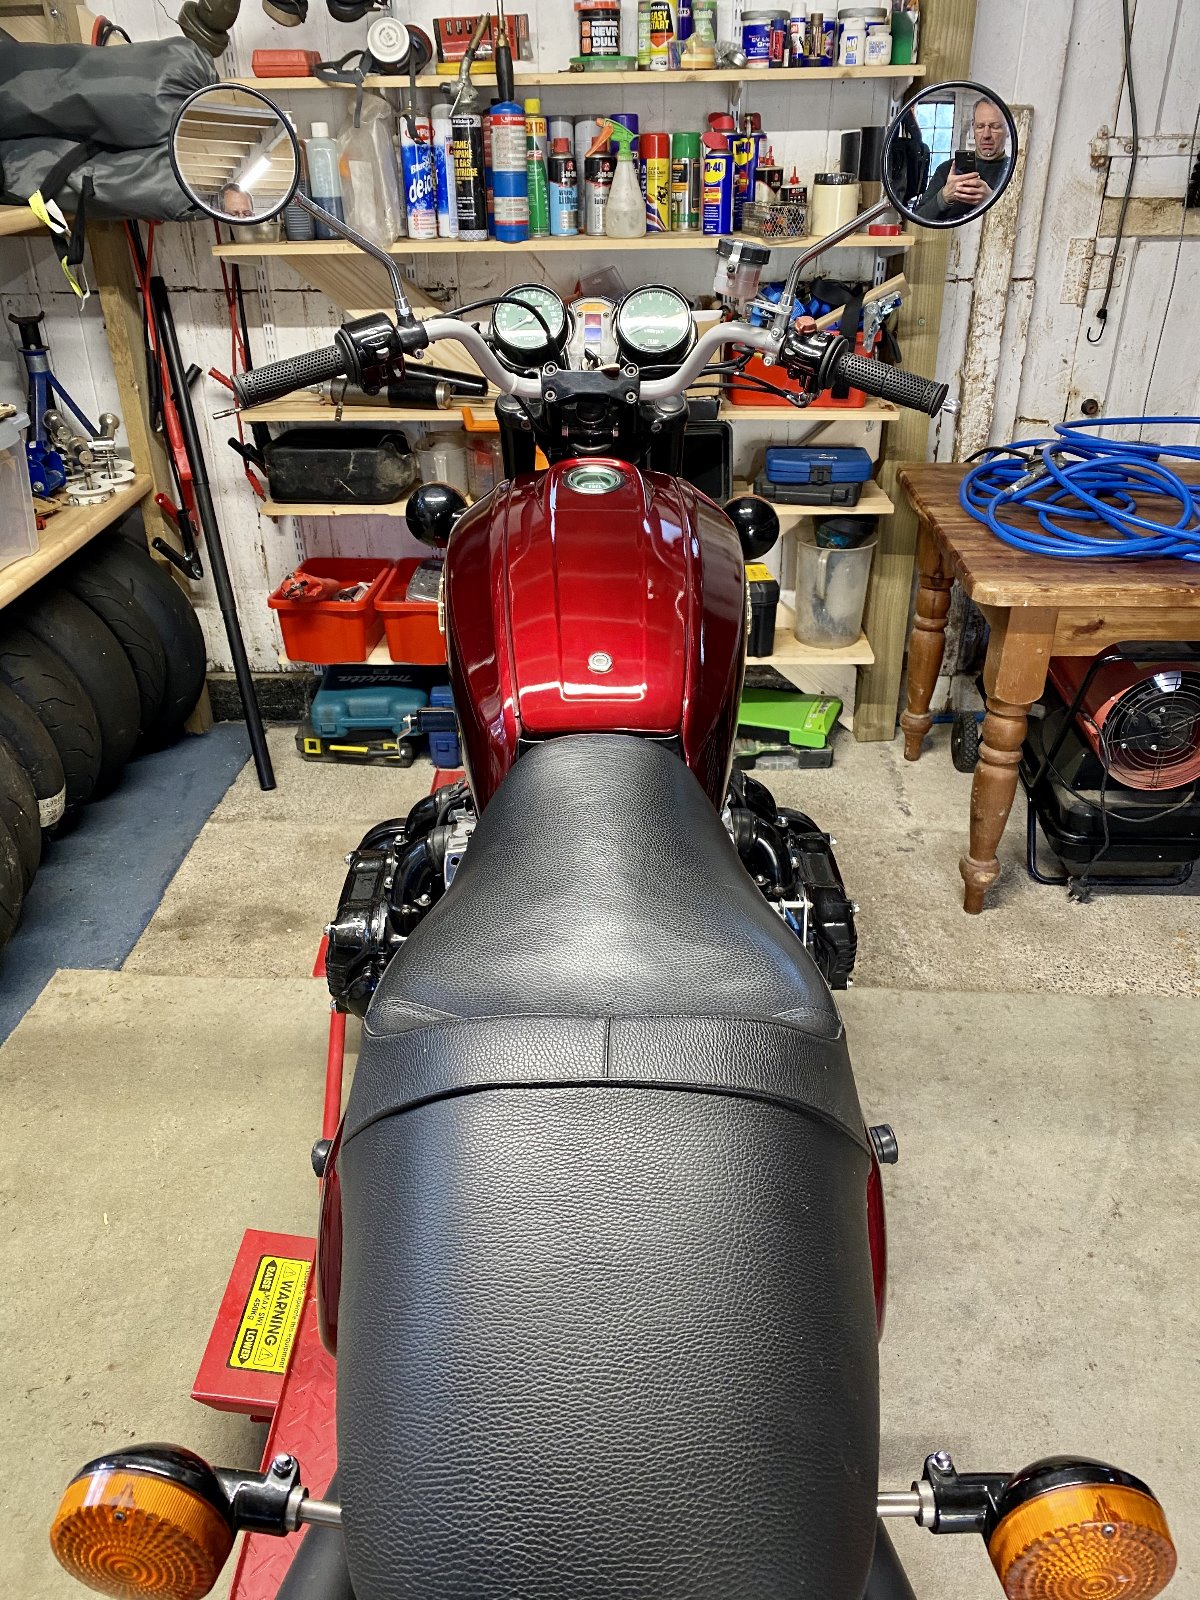
Original number plate. Sorry not showing the registration - it is in the format LLL 111R - where L is a letter, 1 is a number and R is the year 1977. The letters do give the bike a name. First registered in London on 17 Jan 1977. The bike was sold with a twin 'bench' seat which was usually replaced (when it wore out) by an aftermarket touring 'king and queen' seat (I have one to go with the bike - tatty - but could be recovered). The rear fender / mud guard was so rusted (it was all filler) that it was unsalvagable. I replaced it with an American sourced short fender to match the Corbin seat and a later model brake light mount. Signals are mounted further forward using the mounting points for the original pillon hand rail. The Marshall exhausts exit wide to clear the suspension - I planned to replace it with some Harley chrome mufflers (which I have) routed tighter to the bike for a cleaner look but never got round to getting it done (I need to learn to TIG weld). The Harley mufflers and a used stainless Jammo aftermarket exhaust system (with which I was going to create the header pipes) will come with the bike. Complete aftermarket systems are still available for the bike.

Left rear profile of the Corbin Seat. Made in Florida specifically for the GL1000 - it has a generous seat designed for generous American seats.

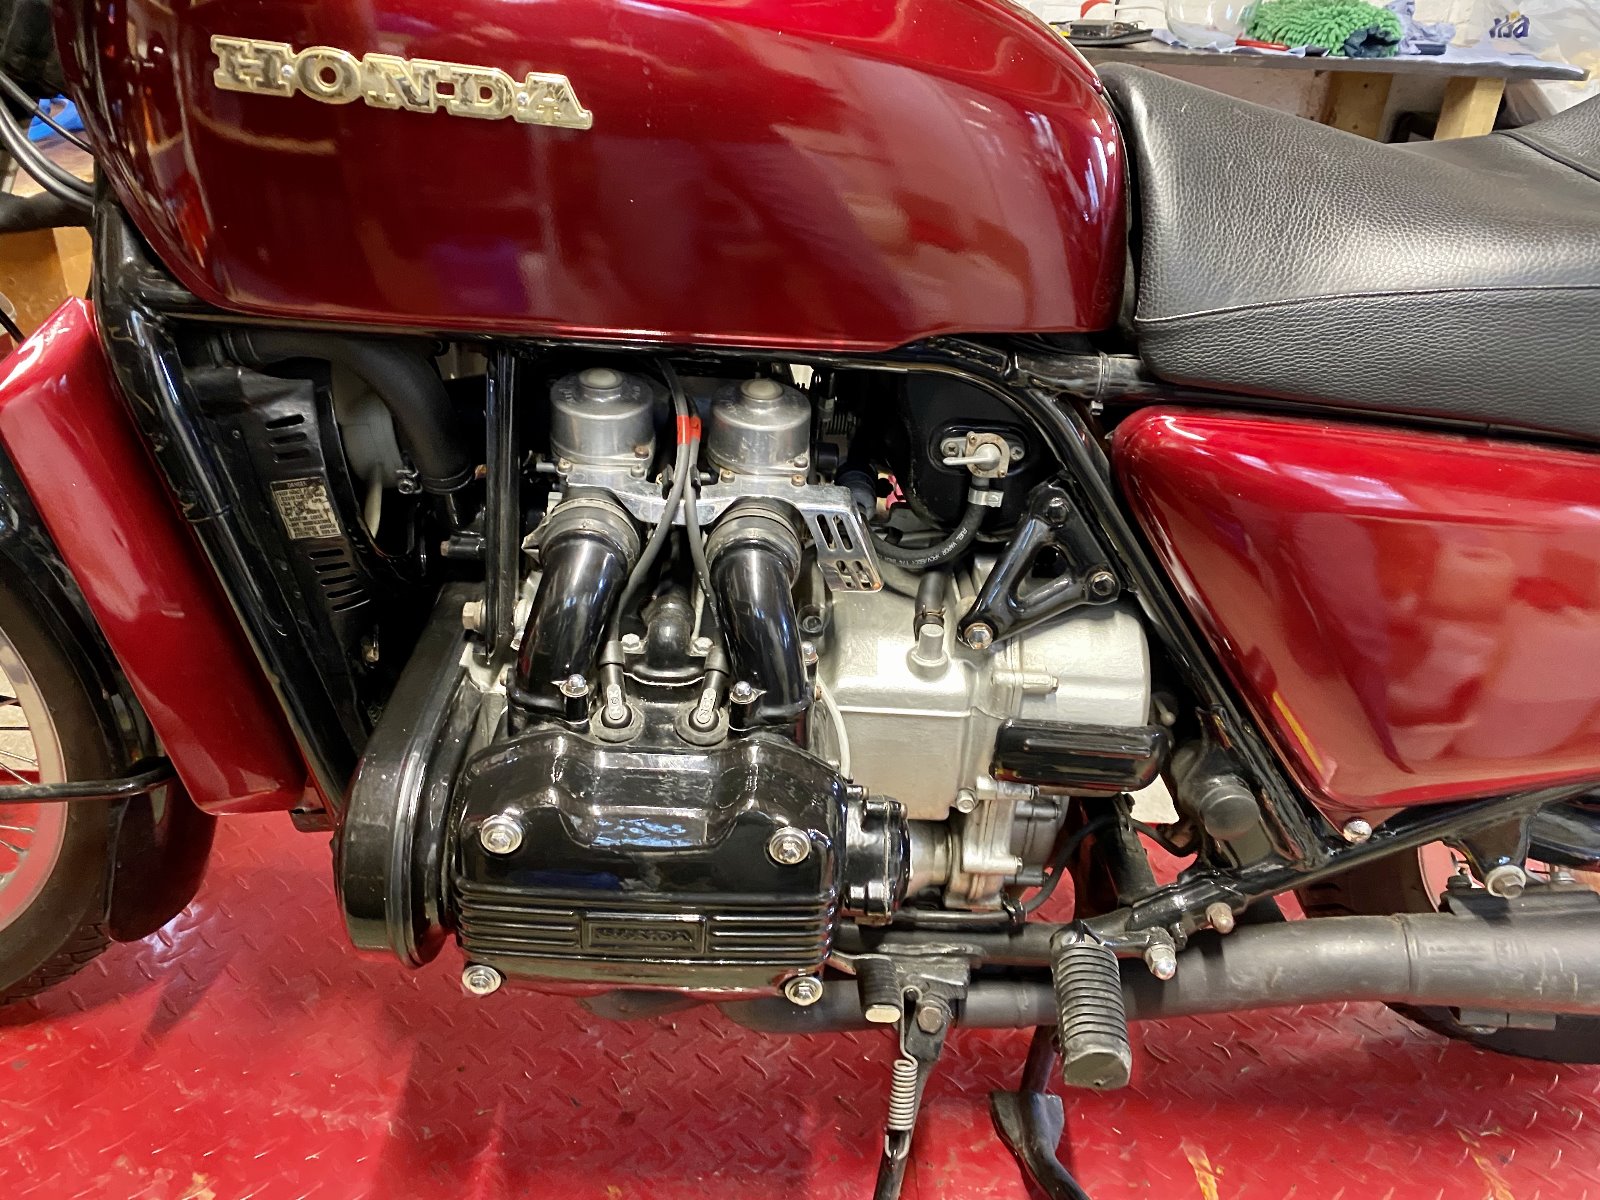
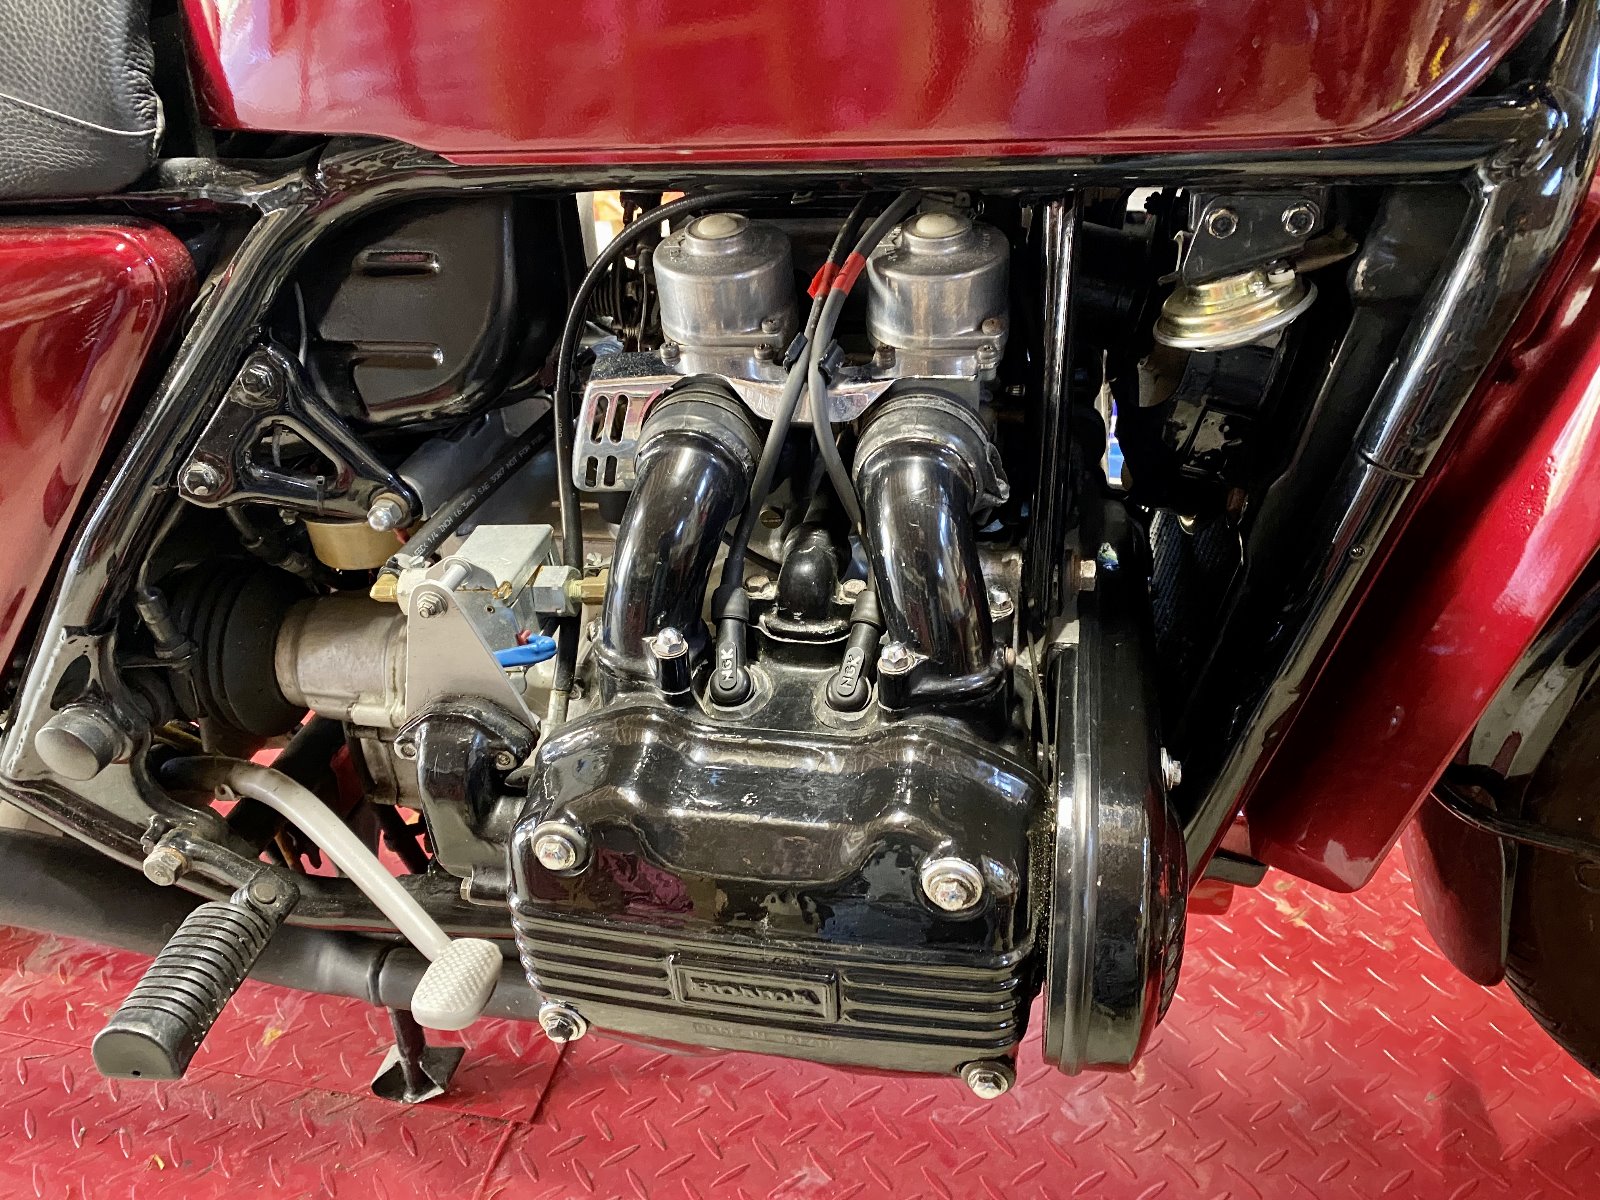
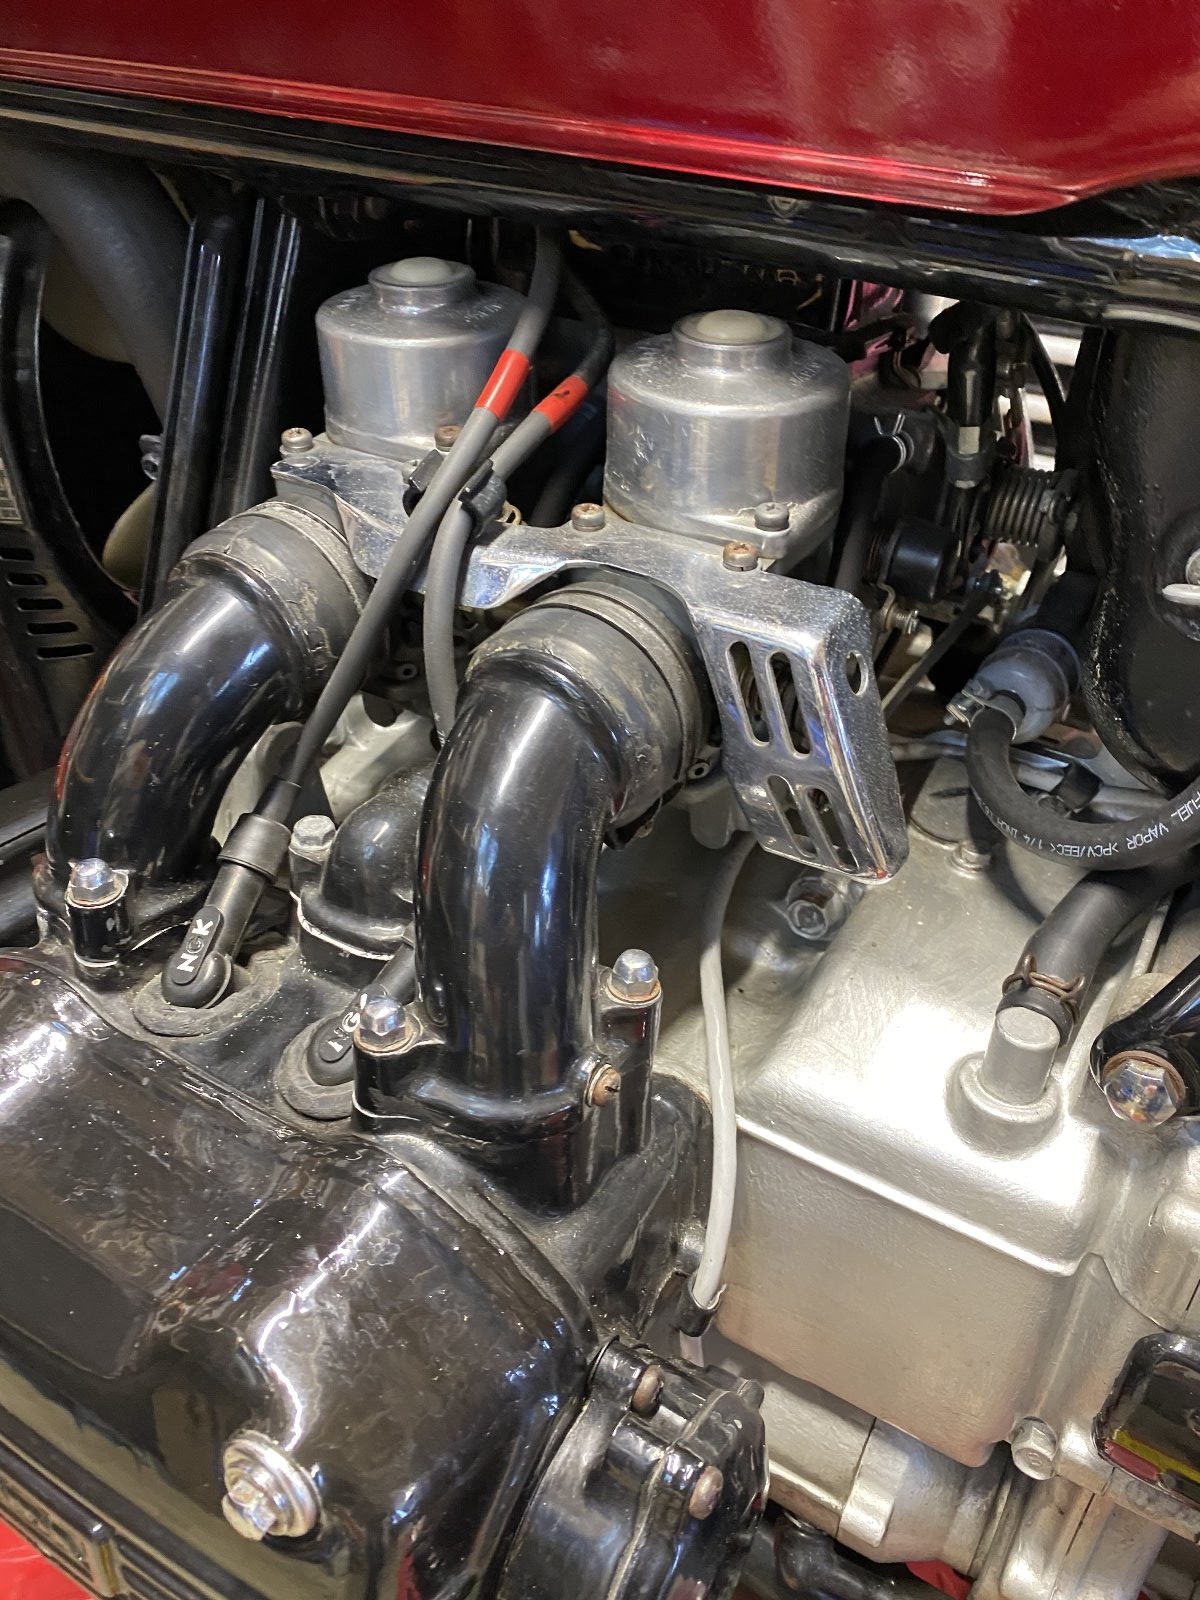
A more complicated carb set up you could not ask for. 4 Keihin carbs in a square pattern, all needing choke and throttle controls breathing through a central plenum into separate runners. Fortunately Randakks does an excellent rebuild / balance video and sells complete service kits using modern (ethanol tolerant) seals and o-rings. I also figured out a few ways to get the basic set up close before having to put a carb balancer on the system. (I will provide a pdfs of the rebuild including all the hints / tips and short cuts I found). Plus there are excellent resources on the Naked Goldwings Forum at www.ngwclub.com. Despite her age this Goldwing runs beautifully and smoothly - as you would expect from an engine with great primary balance. The beauty of a boxer 4.

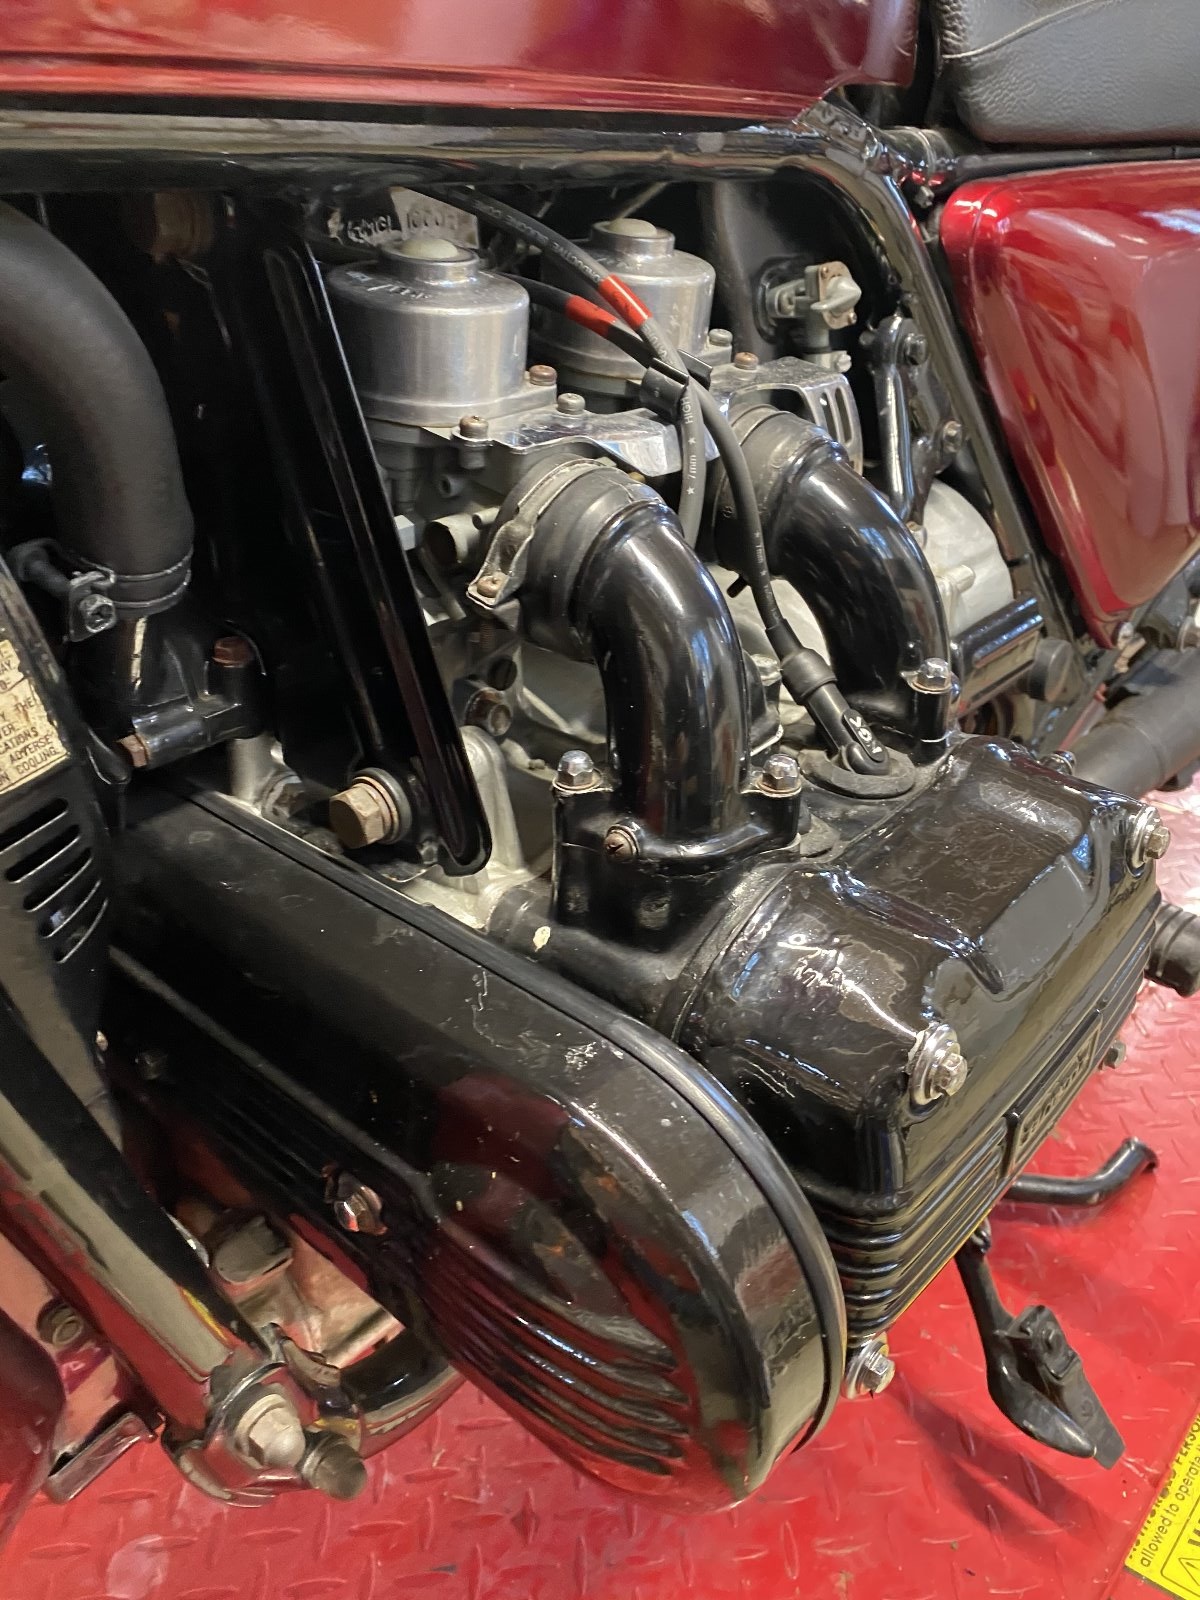
A single overhead cam with 2 valves per cylinder is driven by a belt from the crank. A simple system but the belts need to be changed regularly as the cylinder head is an interference design - if the belt brakes the pistons will hit the valves. Servicing consumables for the Goldwing can be found at very reasonable prices at David Silver Spares.

A 4 channel carb balancer will come with the bike - but in 8 years it has not been needed since the initial set up. The bike will come with 2 full spare carb setups (1 x 1976 and 1 x 1979 - both need rebuilding with Randakks kits). The carbs jets and throttle body diameters varied every year as Honda changed the bike to suit the market. The cam profiles also changed to suit the carb. Later GL1000s were less 'revvy'. It is perfectly possible to change the carbs to a different year on the same engine but it is recommended that you use the matched cams. The engine block remained unchanged so you could swap the fitted carbs and heads to the spare engine should it be required. The original ignition system has been replaced with Dyna Coils and leads, and a magnetic timing pick up is fitted (replacing the points system) so no timing adjustments are required.

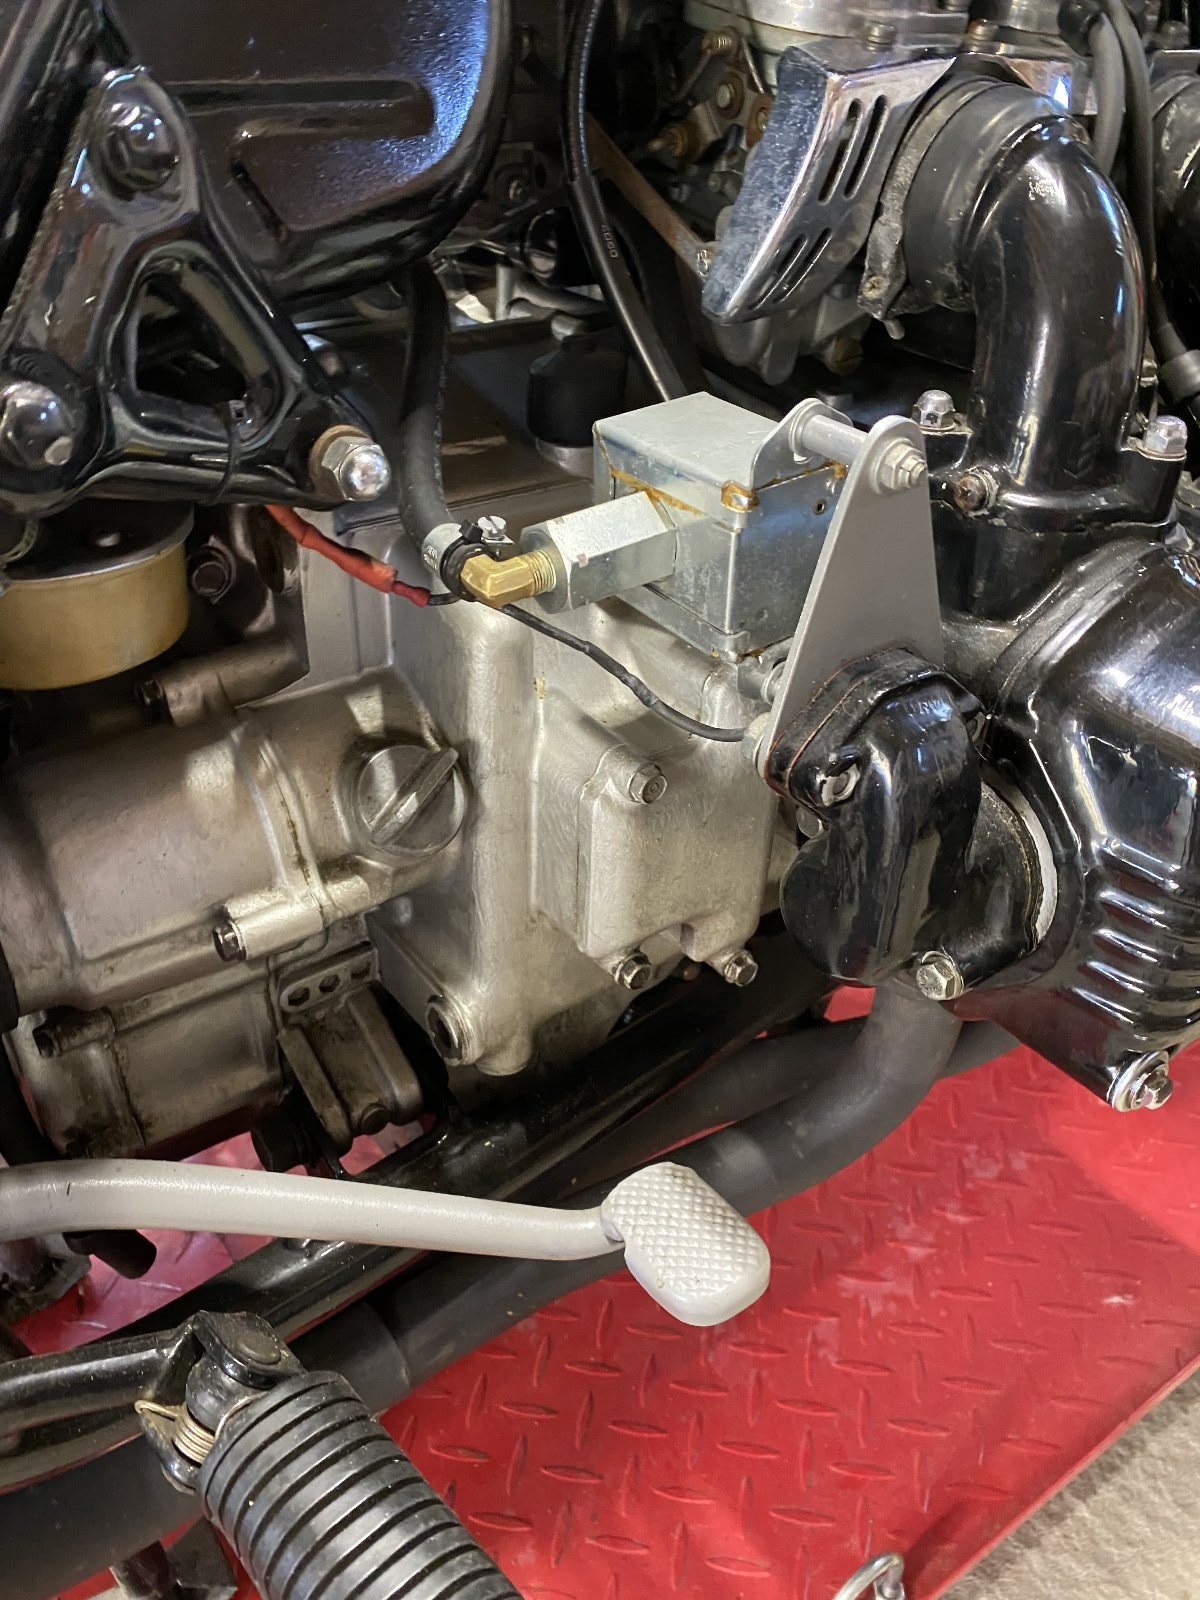
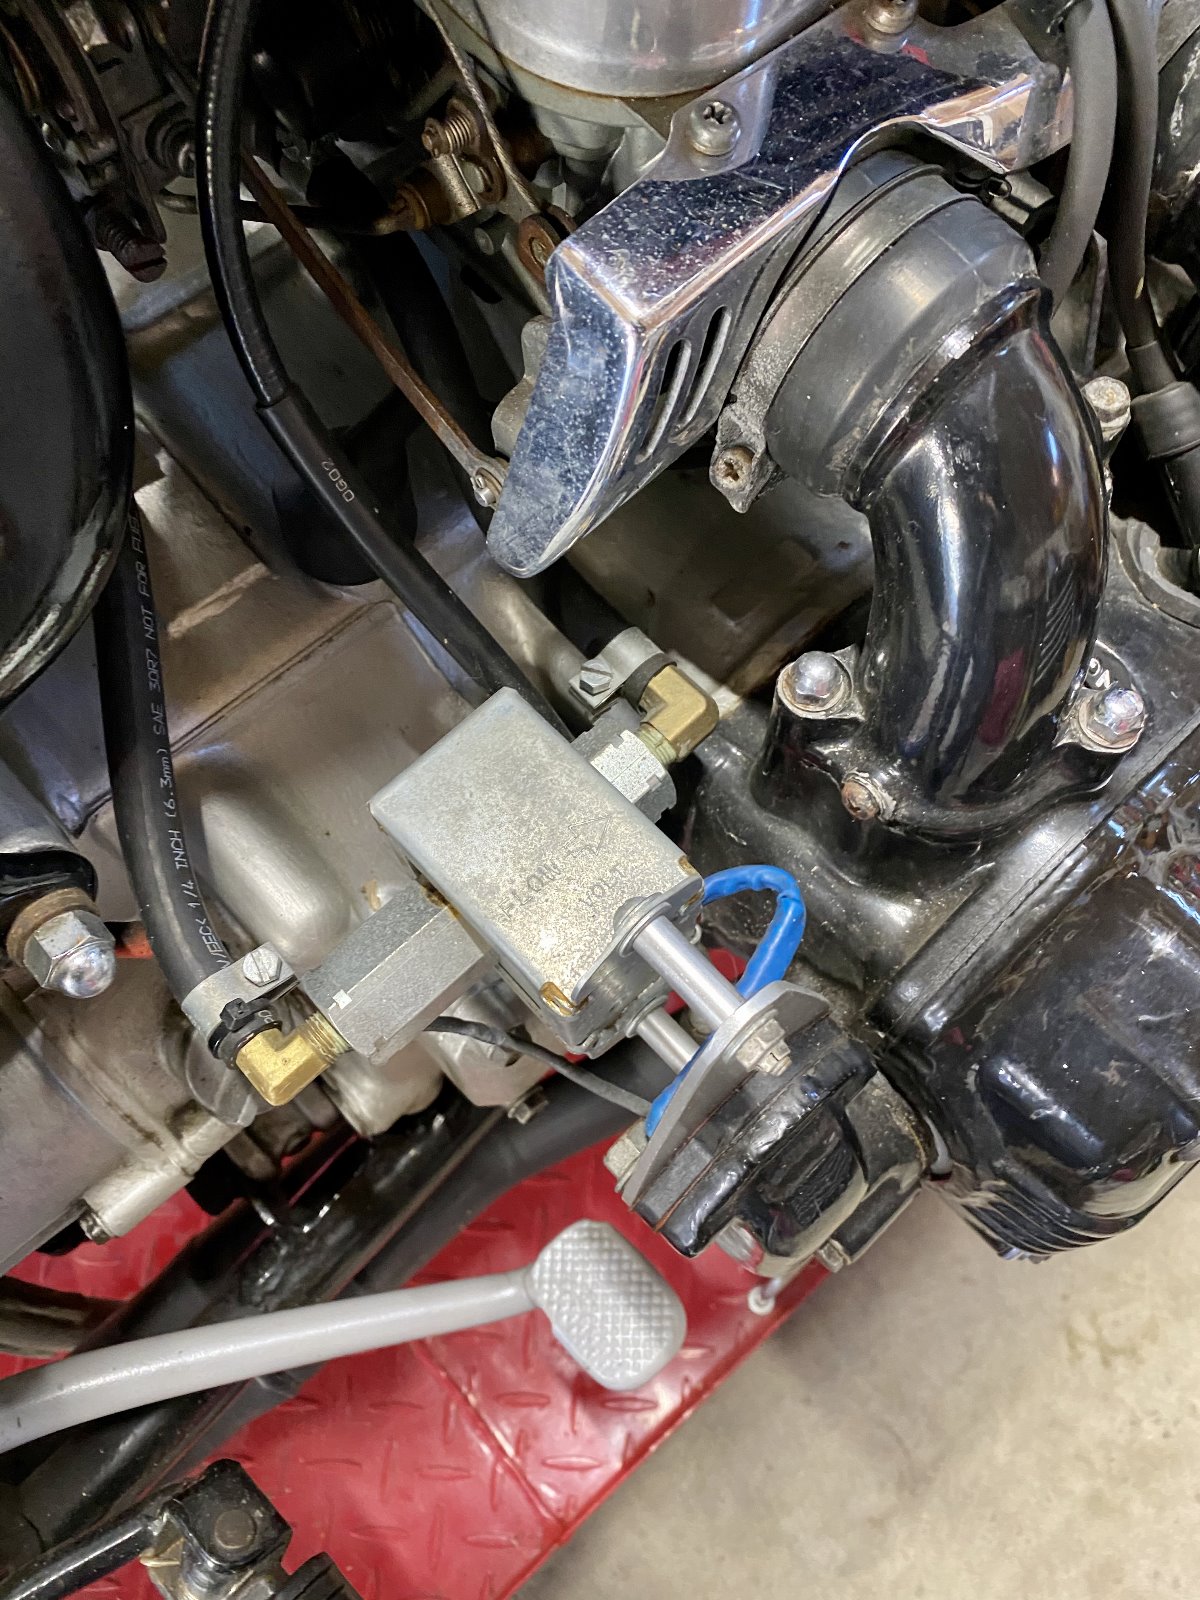
The original mechanical fuel pump which was driven off the end of the left overhead cam has been replaced with an automotive electric fuel pump mounted in the same place. (Randakks kit again). The original pump was not reliable and where it fitted to the camshaft the seal was an oil leak nightmare - your right motorcycle boot was often well oiled. The mechanical pump also took a long time to prime / fill the carb float bowls if the bike had not been used for a long period (or when drained for winter storage) and required the engine to be cranked for a long time before the engine would start. The electric pump runs as soon as the ignition is turned on and so avoids this problem.
I was not completely happy with the paint finish on the engine block- I painted it with a high quality high temperature engine paint sourced from Frost Restorations. It was a very cold winter day when I painted the engine, and the paint didn't flow well leaving a slightly streaky (non uniform) finish.

Under the Corbin seat logo the right body panel hides the main portion of the fuel tank. The battery is under the left body panel. The main tank unit is a dummy hiding the air filter and bike electrics. Honda was practicing mass centralisation or C of G lowering early on; which is a good thing because this is a heavy bike (mostly due to the weight of the engine). The disadvantages of this set up is a lot of the tank fuel volume is below the float chambers of the carbs - hence the fuel pump is required. The other disadvantage is that the right side of the tank is open to debris flying off the rear tire. Over time this lead to corrosion, pitting and tank leaks. I bought 4 tanks until I found one that I felt was worth refurbishing. This was done by a company who specialises in repairing old tanks - their process involves a ceramic internal lining baked on. The tank should outlast the rest of the bike, but just in case the bike comes with a spare.

A different view of the fuel pump mounted on the back of the right cam shaft (but no longer driven by it). At the top you can see some of the complicated linkages used to control the carbs - full instructions supplied!

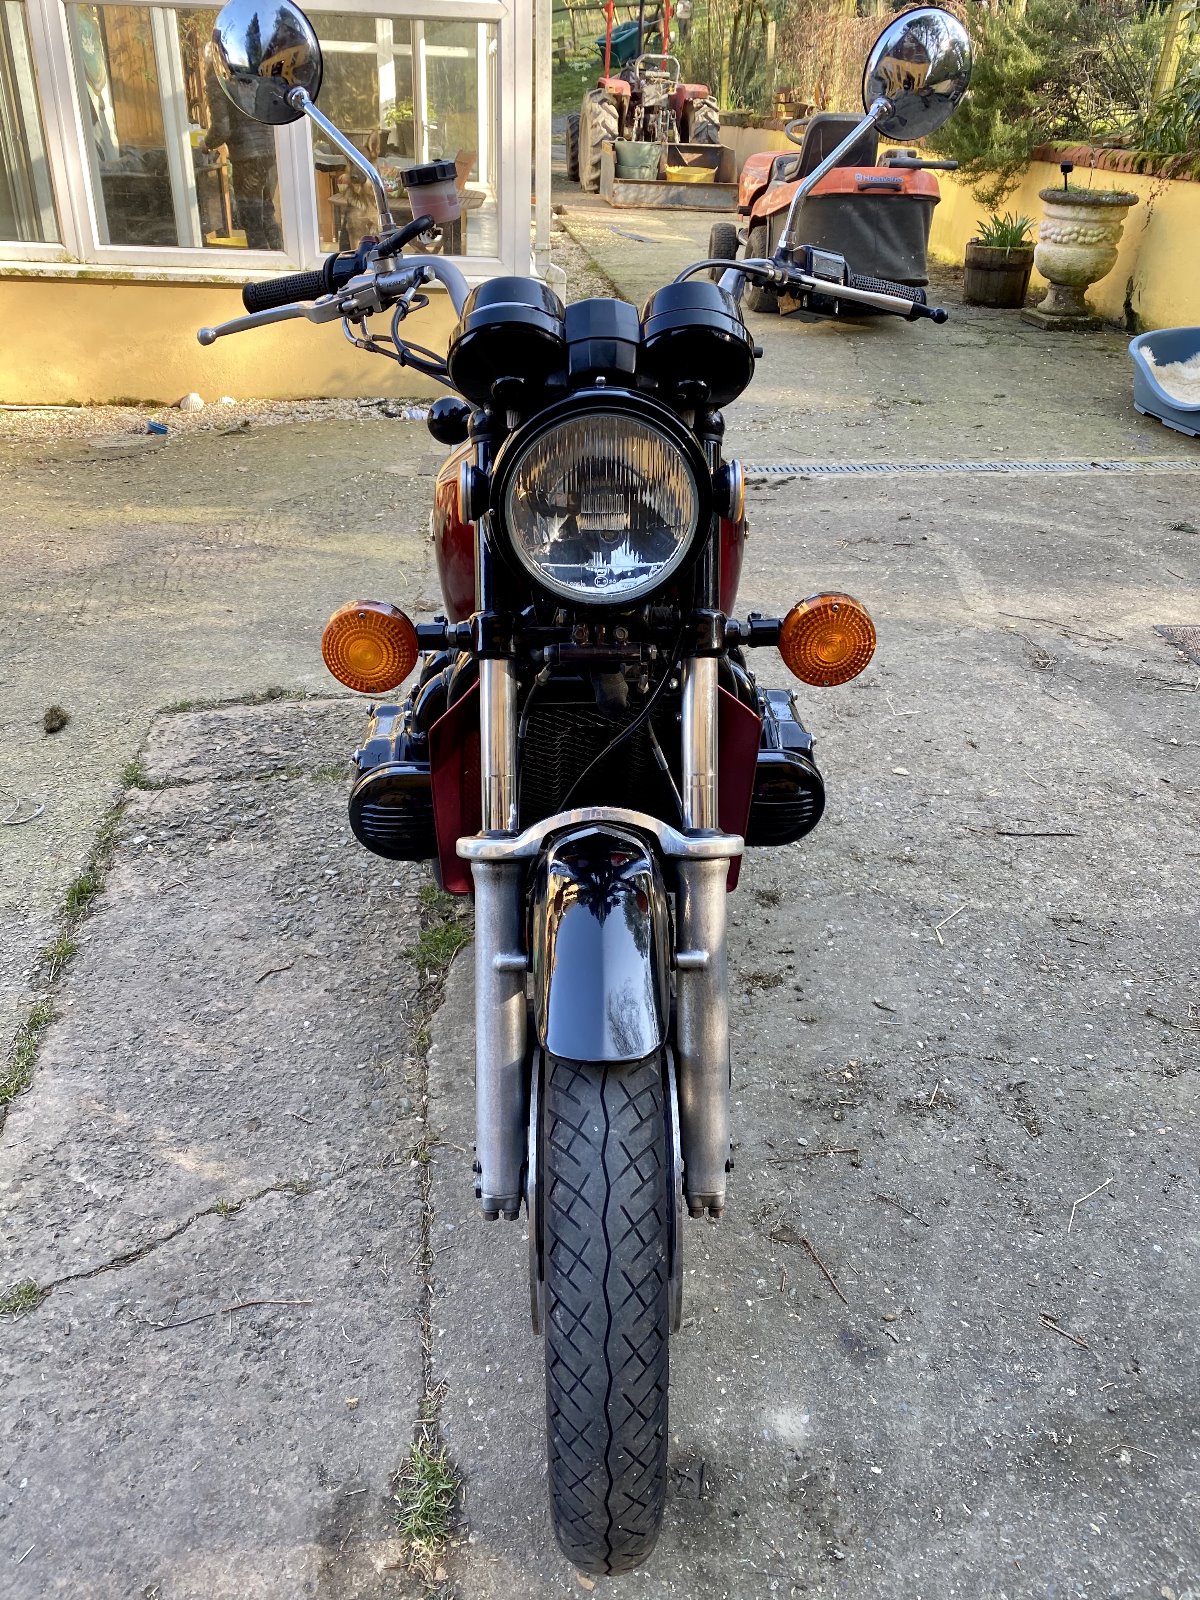
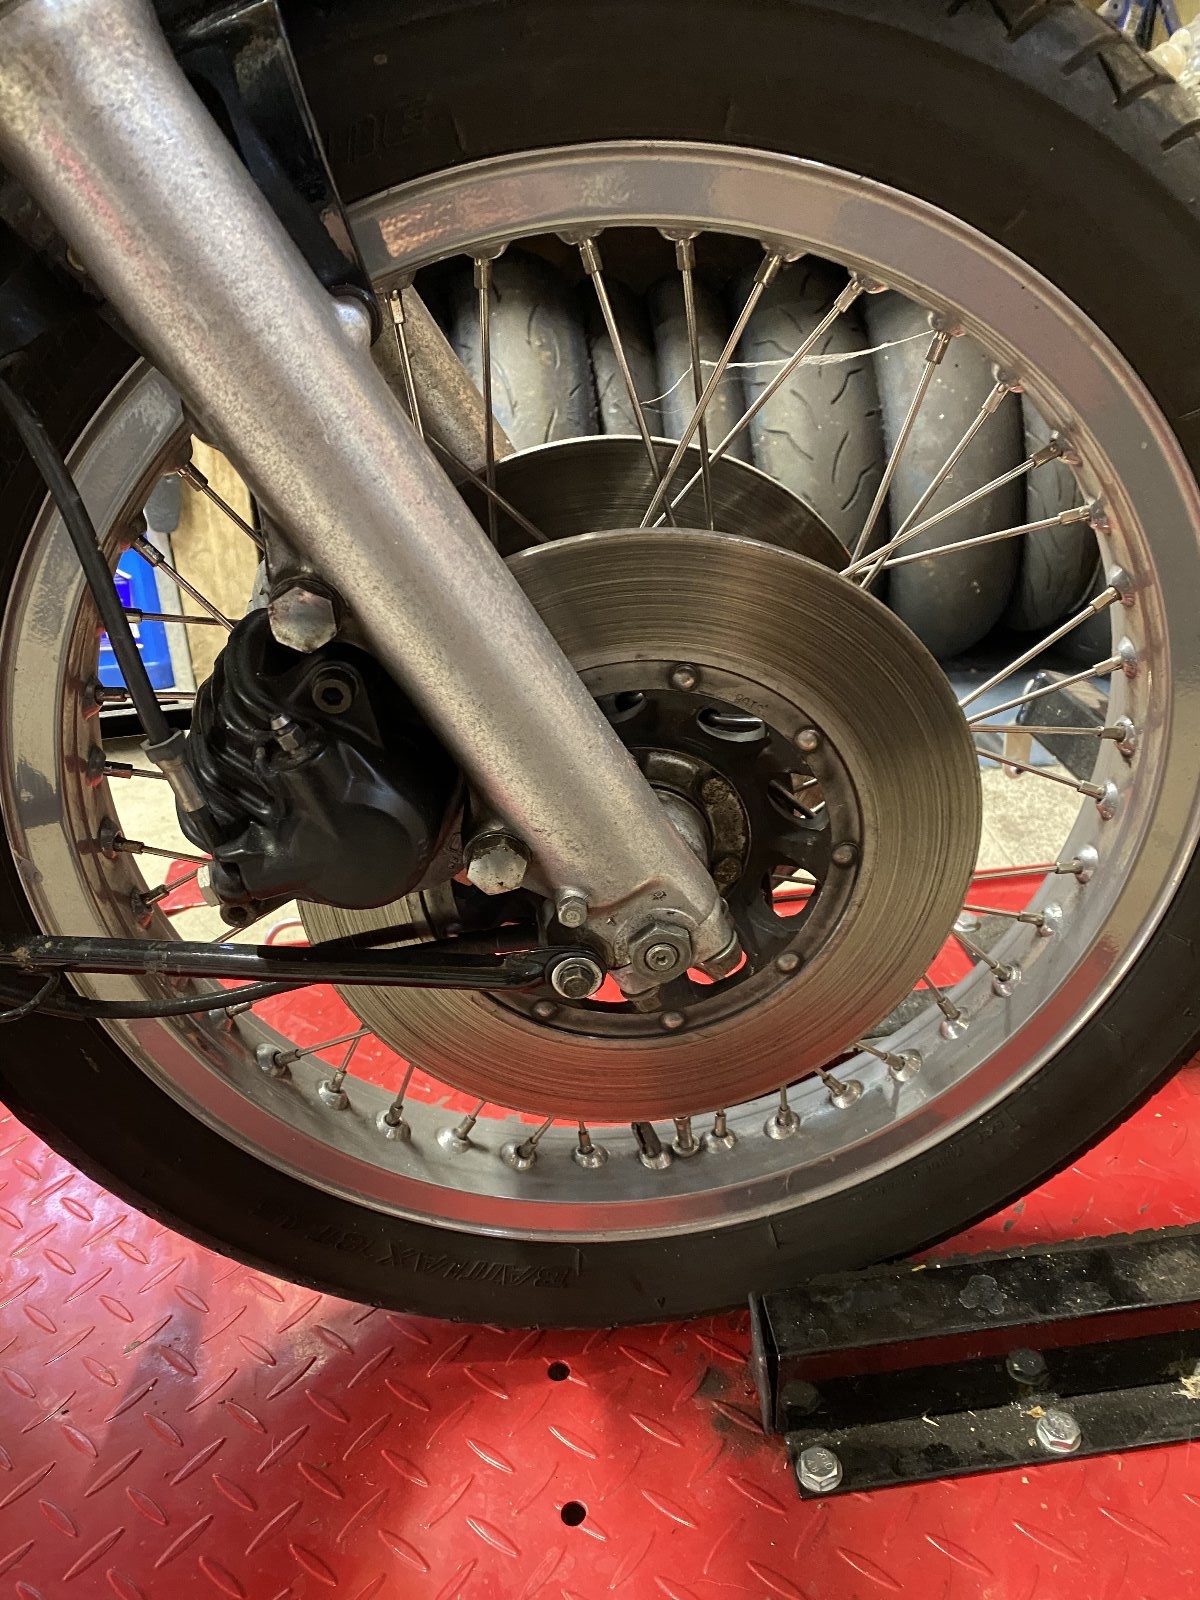
The front suspension on bikes of this period are notoriously flexible. Upside down forks were some way off - there is a lot of tubing below the triple clamps to allow twist and flex. To help the handling a 'Superbrace' has been fitted above the fender / mudguard to add some much needed rigidity. All brake lines have been replaced with braided steel lines and the original brake master cylinder has been replaced with a modern Nissan item to give more power and feel to the brakes.

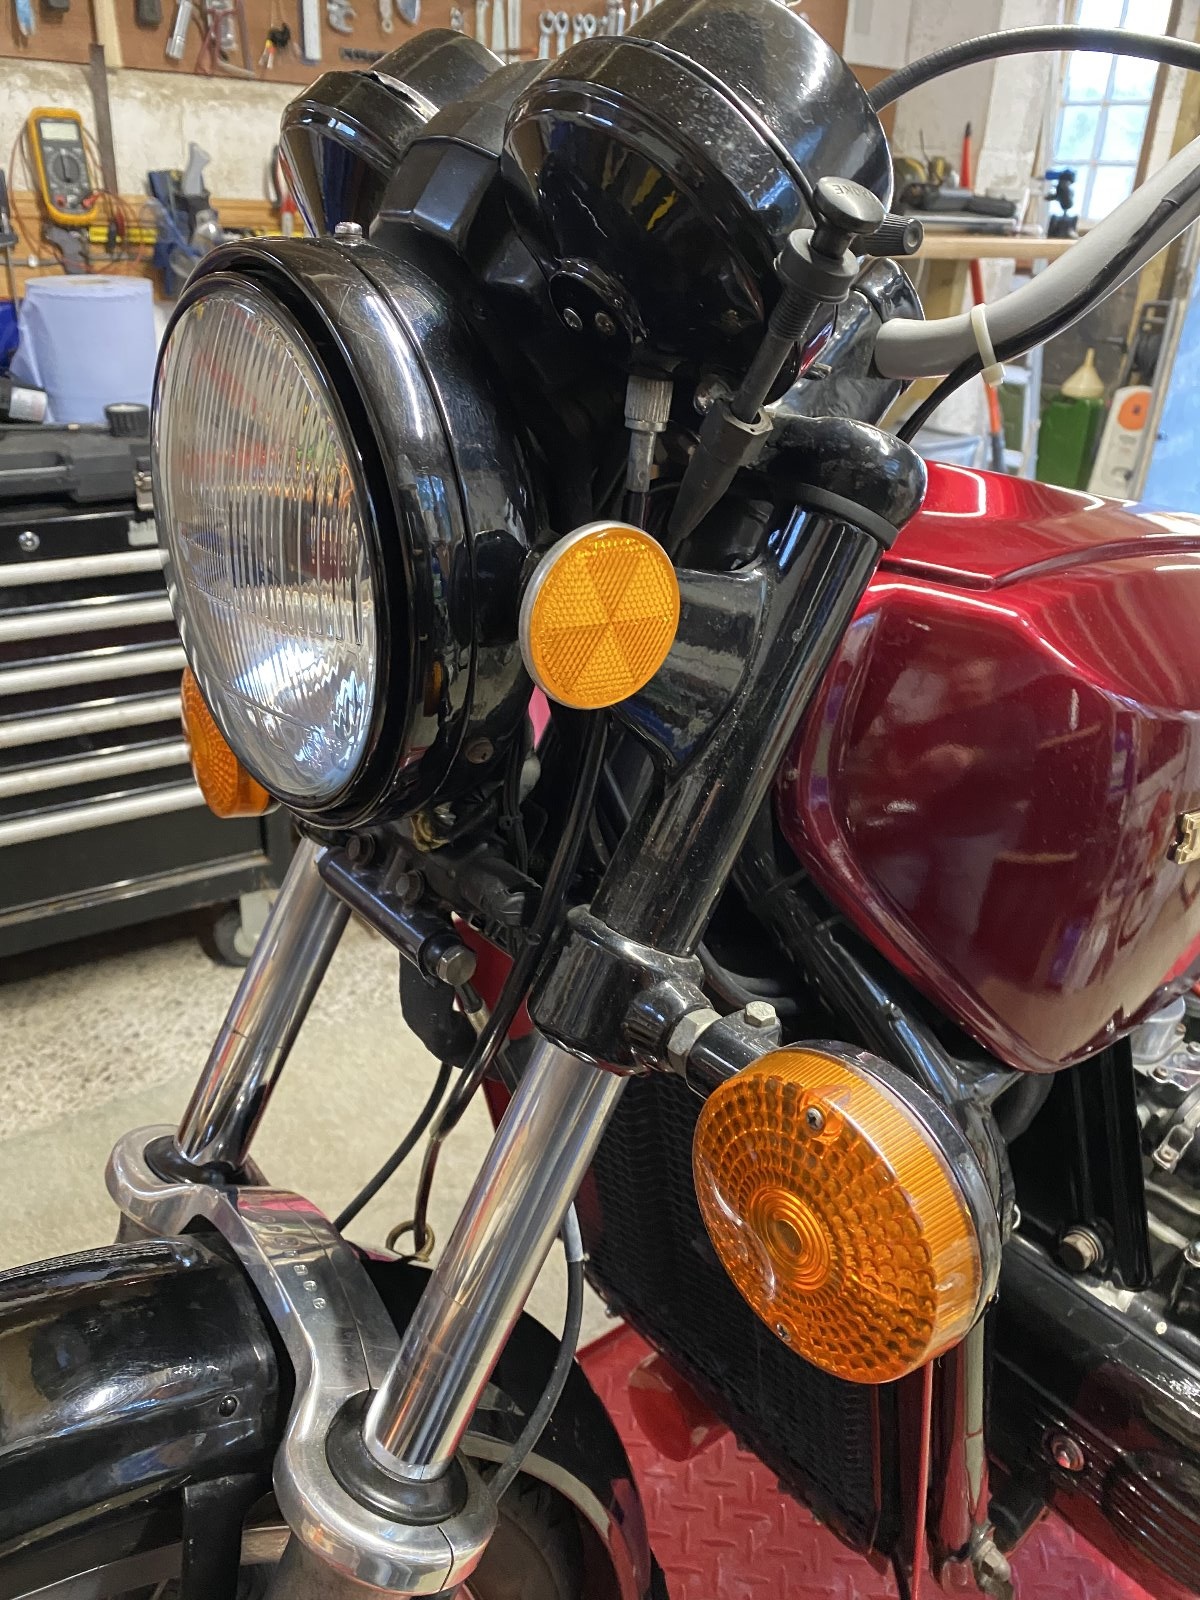
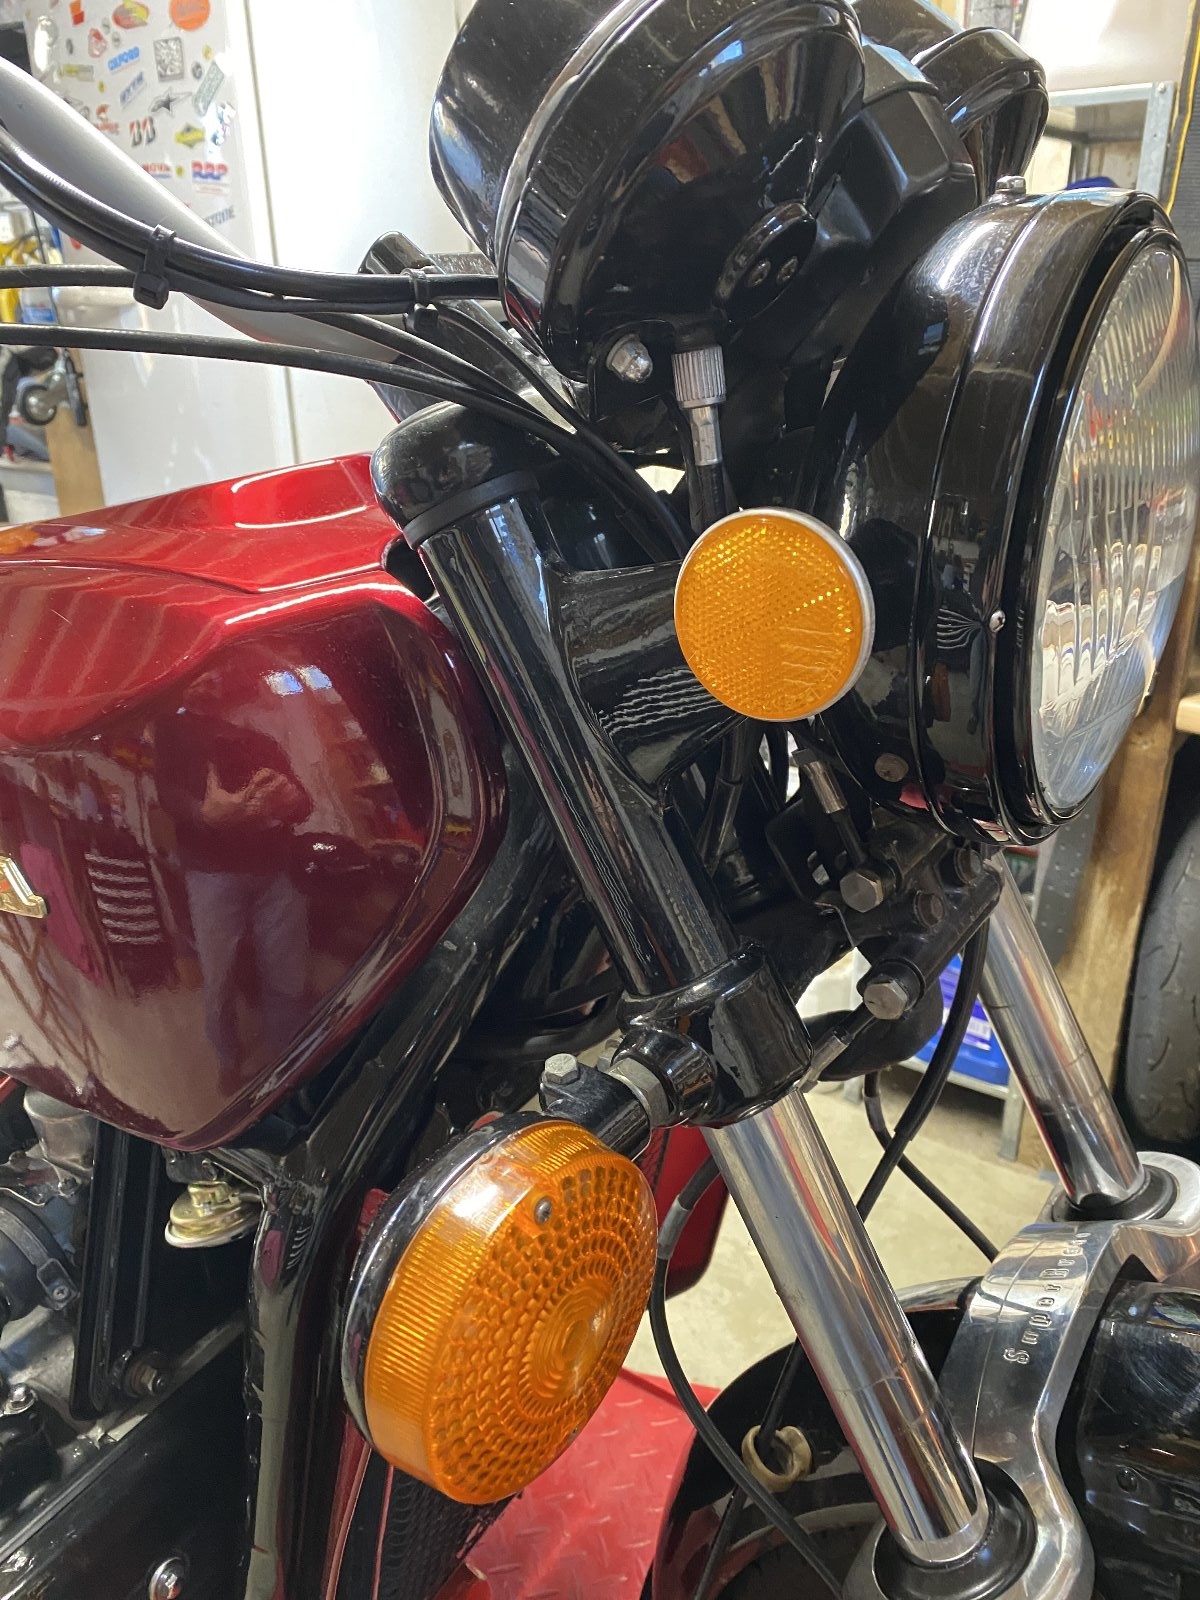
Original lights are very difficult to find. This is a modified aftermarket lens with the bowl from the 79 GL1000 Donor bike I bought. Bits like the reflectors and indicator lenses (plus other odds and ends) can often be found at suppliers such as Consolidated Motor Spares BV in the Netherlands; or at David Silver again. The observant of you will notice I haven't put the choke cable back in it's clip on the left side of the clocks after noticing it was loose (I took it off to check if the clip was ok and forgot to put it back before I took the photo - Doh!).

The right front side showing the cable routing through the headstock. The bike is fitted with a brake pressure splitter unit mounted on the triple tree underneath the headlight. The brake light is normally operated by a pressure sensor on this unit. At the moment it is not connected because the new Nissan Brake Master Cylinder has a mechanical (and more reliable) switch which is wired in.

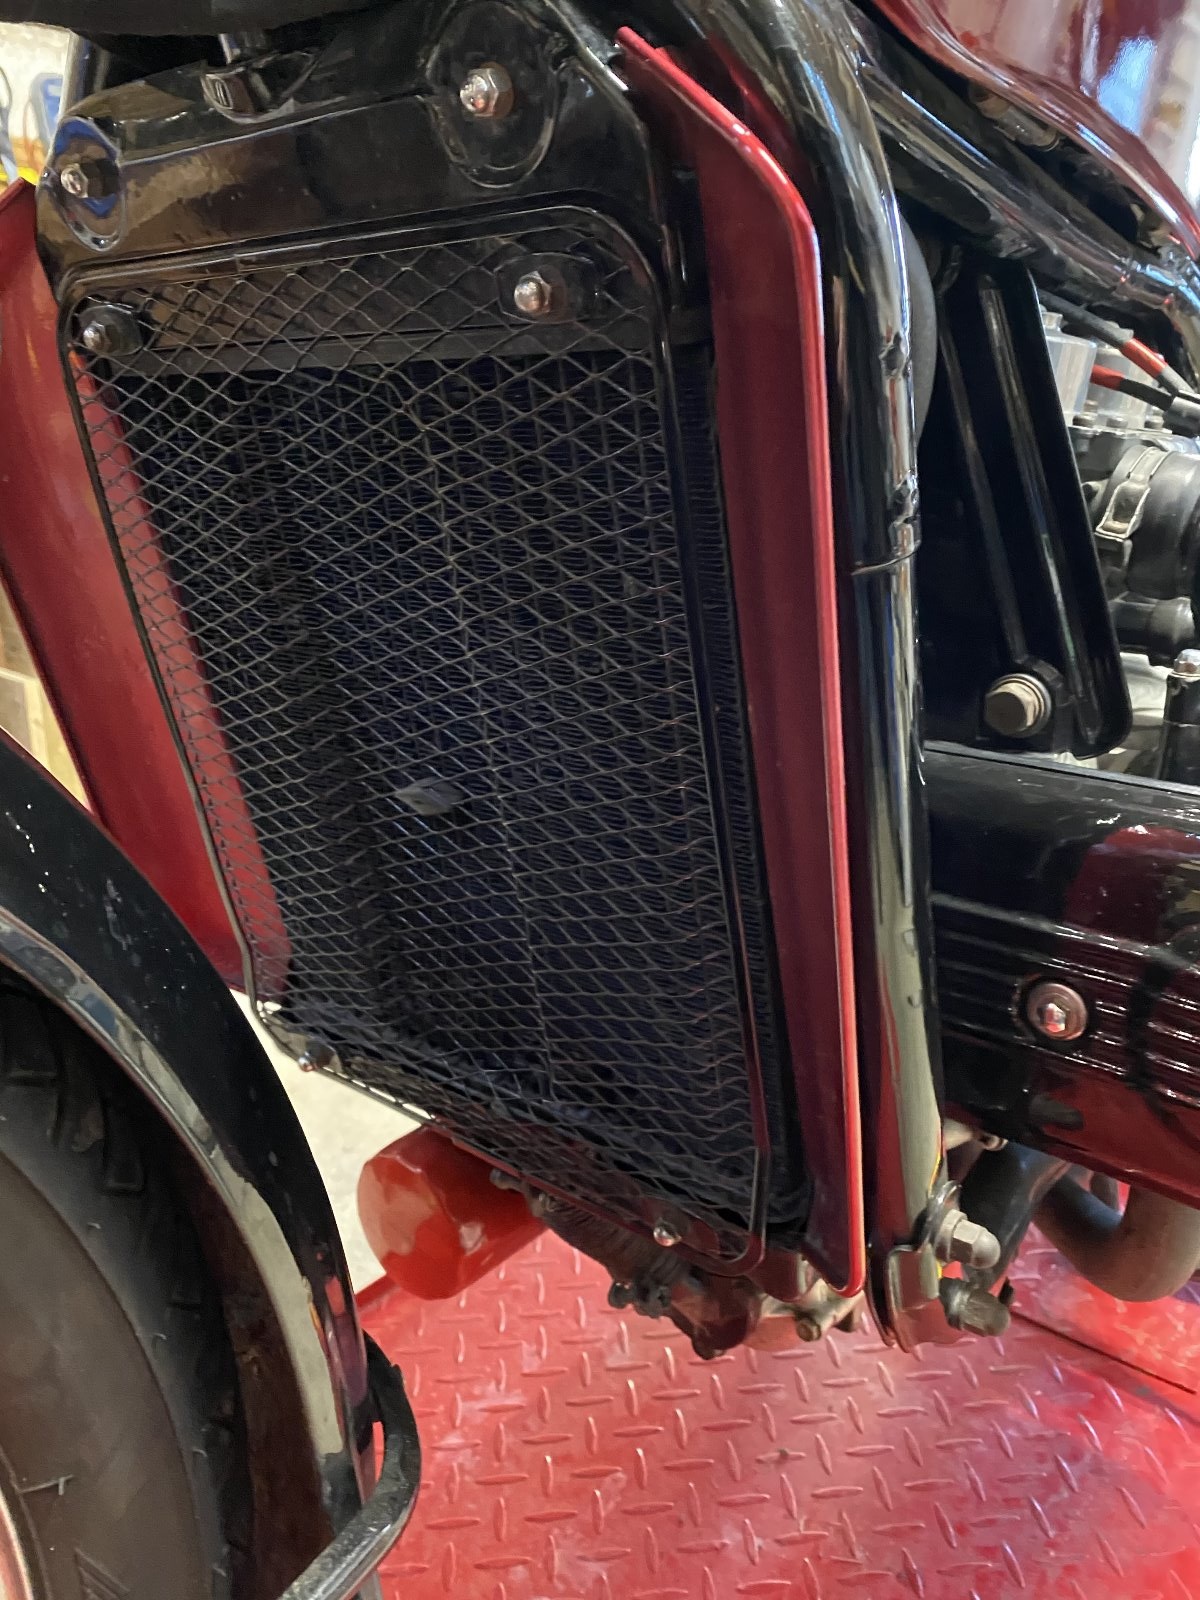
Large radiator with original wire stone guard. The bike cooling system is a bit OTT for the UK - the fan rarely runs. The original radiator was is good condition and did not need refurbishment. As with other bits of the bike I have a spare that will be sold with the bike. The original oil filter was a cartidge type; I have fitted an adapter (Randakks) to allow a modern spin on filter to be used.

A big wide seat. Fuel guage is on top of the false tank. All controls have been rebuilt and work perfectly. The bars are not the originals and would have be slightly higher and swept further back. These bars were on the bike when I got it and it wasn't until I got the donor bike that I realised they weren't orginal. I guess they were a replacement either because they didn't fit with the fairing that was fitted to the bike, or just as likely, the bike had been dropped at some point (they are not the strongest looking and drilling them to run the electrical wires internally must also compromise the strength). They did, however, fit the look of the bike I was trying to create - so stayed. Mirrors are aftermarket and remain clear at speeds - the bike does not vibe. The engine is creamy smooth. It has one disconcerting rattle at idle - there are 3 internal chains on the back of the engine driving the gearbox and accessories. The main drive chain to the gear box does not have a tensioner so rattles at idle engine speeds - and yes they do all do that, Sir!
Interestingly this bike has a removable kick start! This was the last year Honda fitted one. The kick start lever is kept in the right part of the false tank and is useful for turning over the engine when doing the timings. I have kick started the bike once just to prove it works!

Another view of the clocks. All lights and controls work as advertised. Internal bulbs have been replace with LEDs to reduce the inevitable 'is it a blown bulb or something else' moments! Typically Honda - it has to be in neutral to start!

Spoked wheels were rebuilt with stainless spokes by Central Wheels in Birmingham. The original DID rims were so pock marked as to be unrestorable to their original chrome surface condition so were powder coated silver. Unless you are up close you can't tell. Some owner drill their disks to try and improve the wet weather braking performance but since this bike doesn't get ridden in the wet I haven't. Single pot dual disks brakes are at best described as adequate - the new Nissan master cylinder has made a big difference. In this picture you can see the surface of the suspension leg is not perfect and could do with refurbishing. I was also considering asking if Hagon or Nitron could do a cartridge shock to replace the internals but again I haven't got round to it.

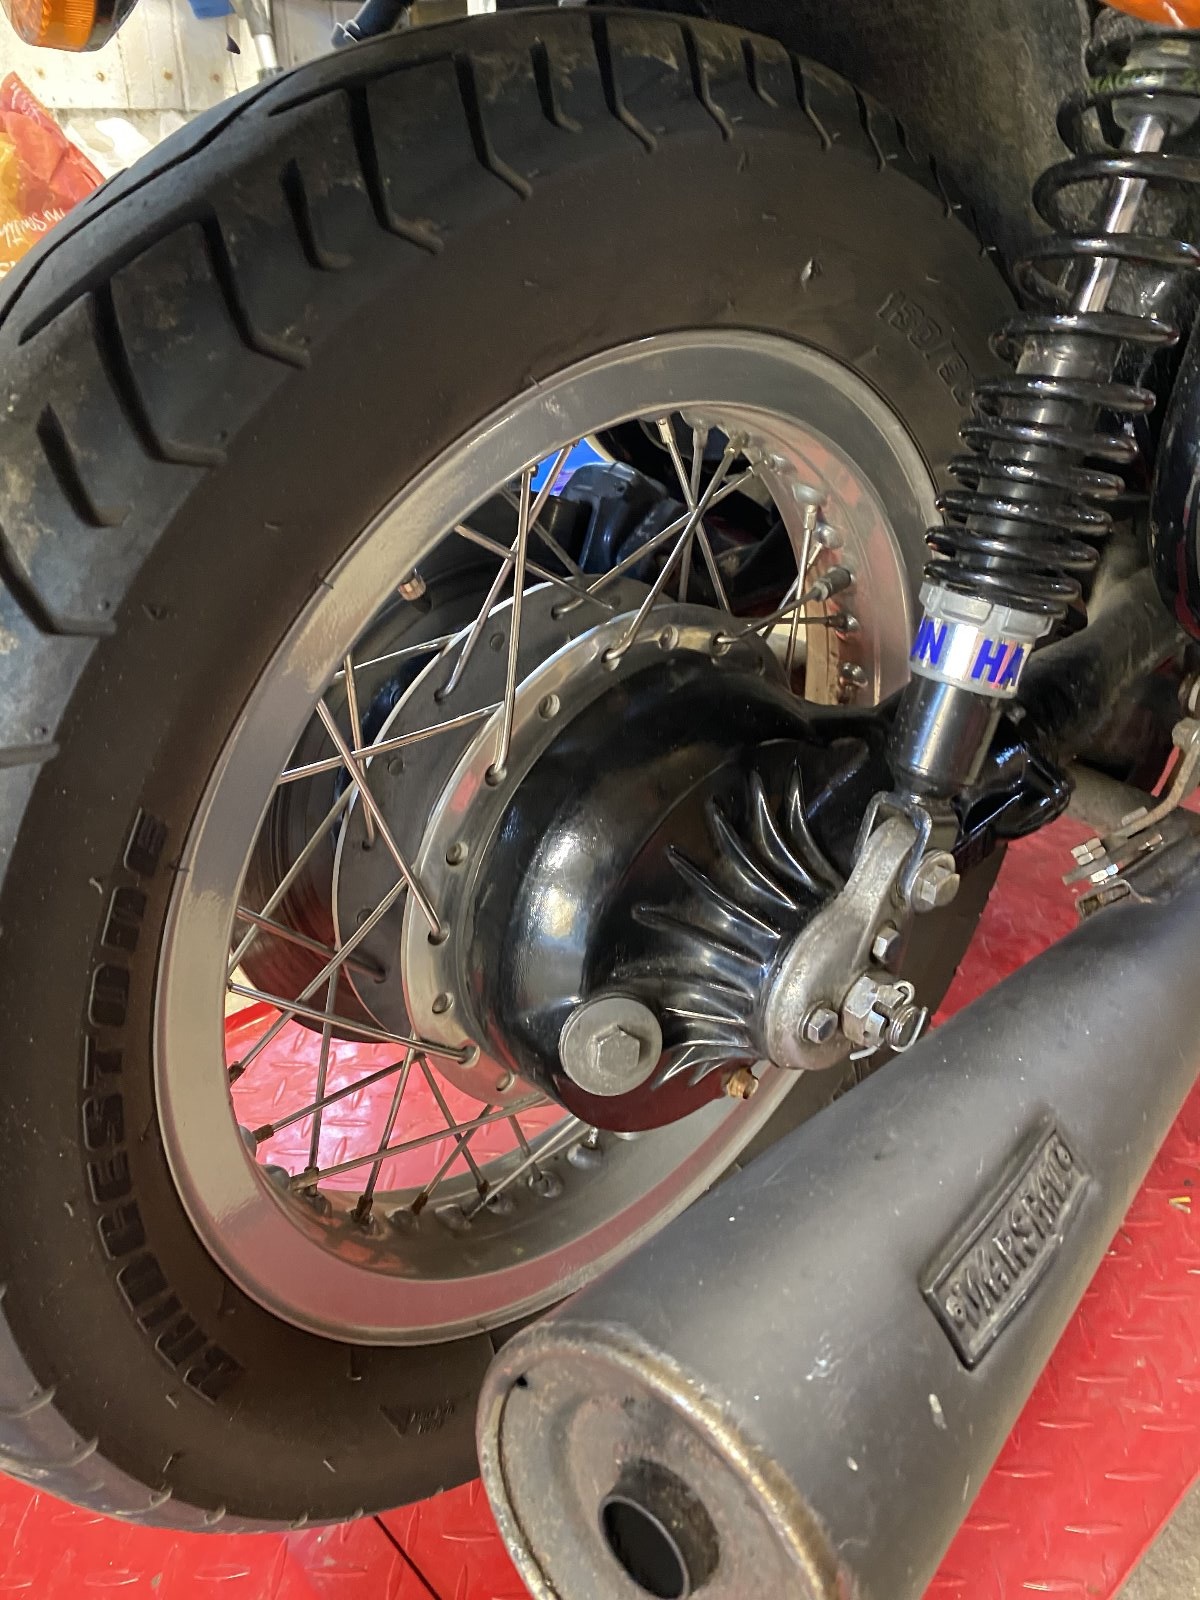
Shaft drive and low maintenance. No lash in the drivetrain - there is a huge spring on the drive train post the clutch to take up any wear in the linkages. It works well. Again the rear spoked wheel was rebuilt with stainless spokes and powder coated silver. With the bike will be another set of later 'Comstar' wheels - nowhere near as attactive but probably lighter. The Comstars might need some custom spacers to fit this earlier bike if they were prefered.
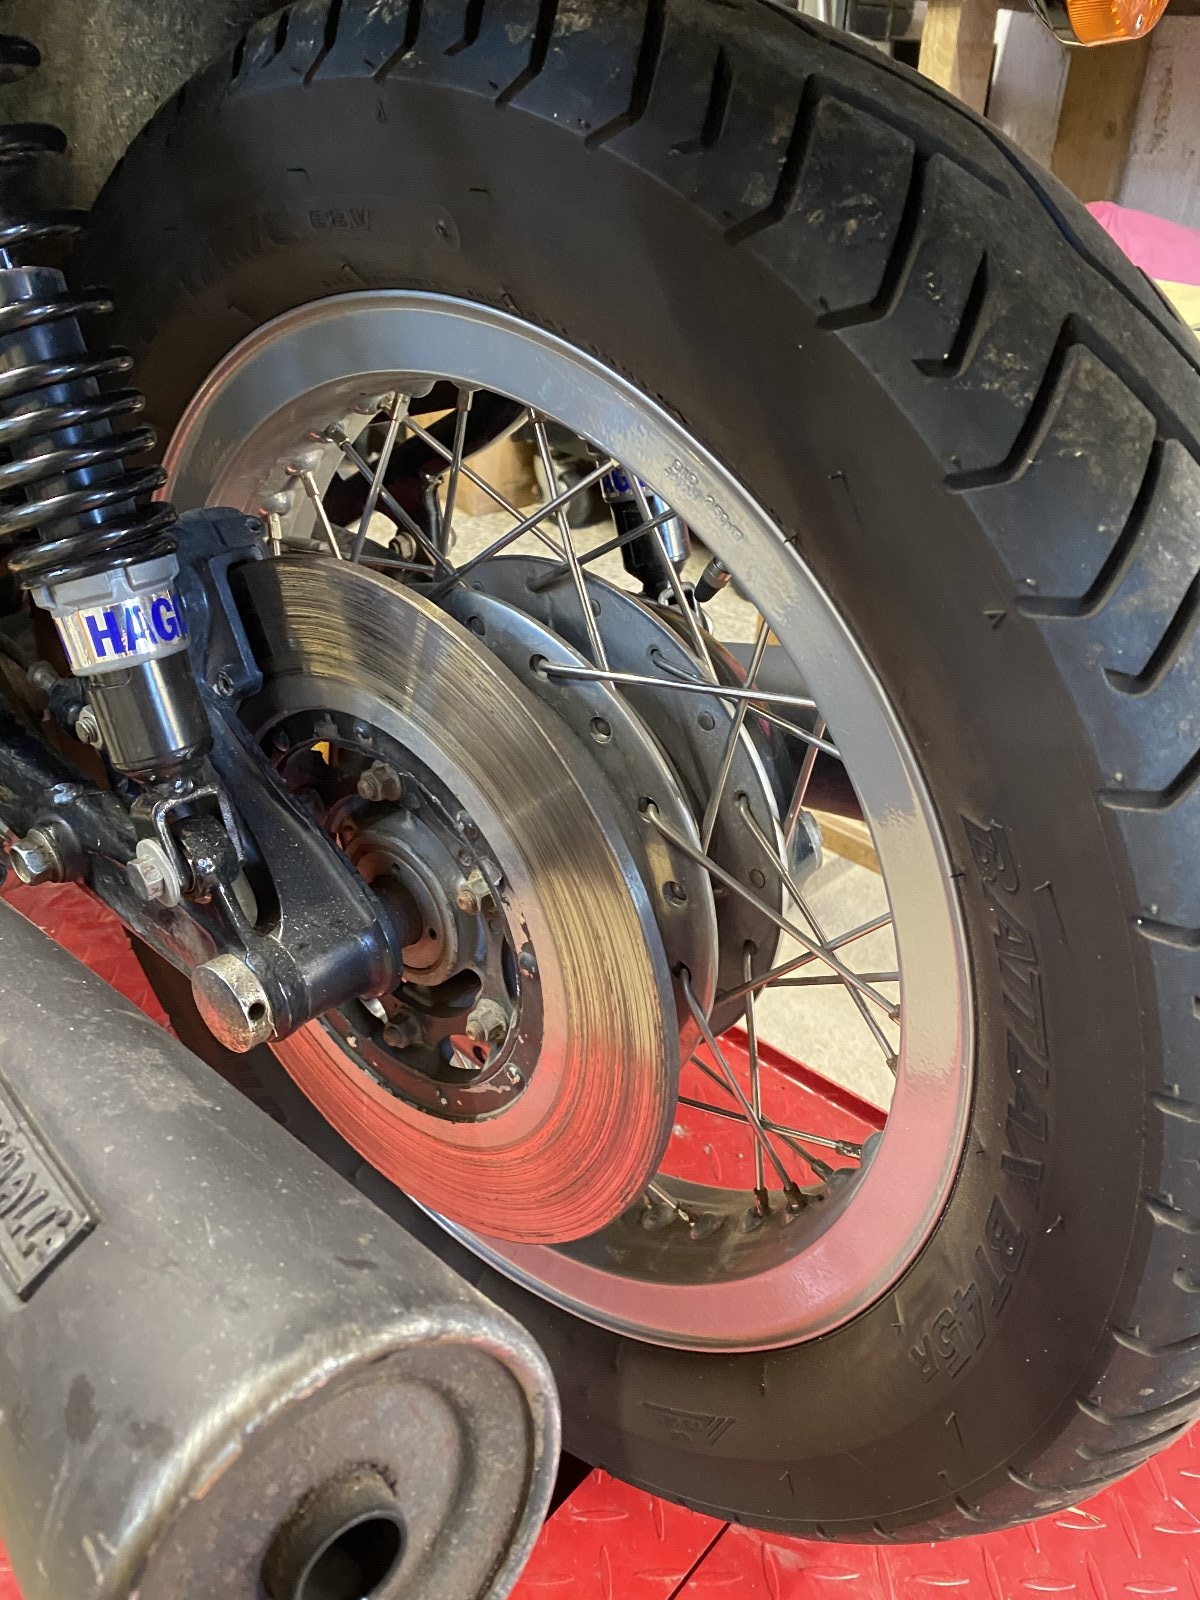
Rear wheel showing the solid disk and floating brake caliper. The rear brake is surprisingly effective; I think a product of the rear weight bias of the bike with the combined weight of the engine and the 5 gallon tank under the seat. Front and Rear brakes together is definitely the most efficient stopping.

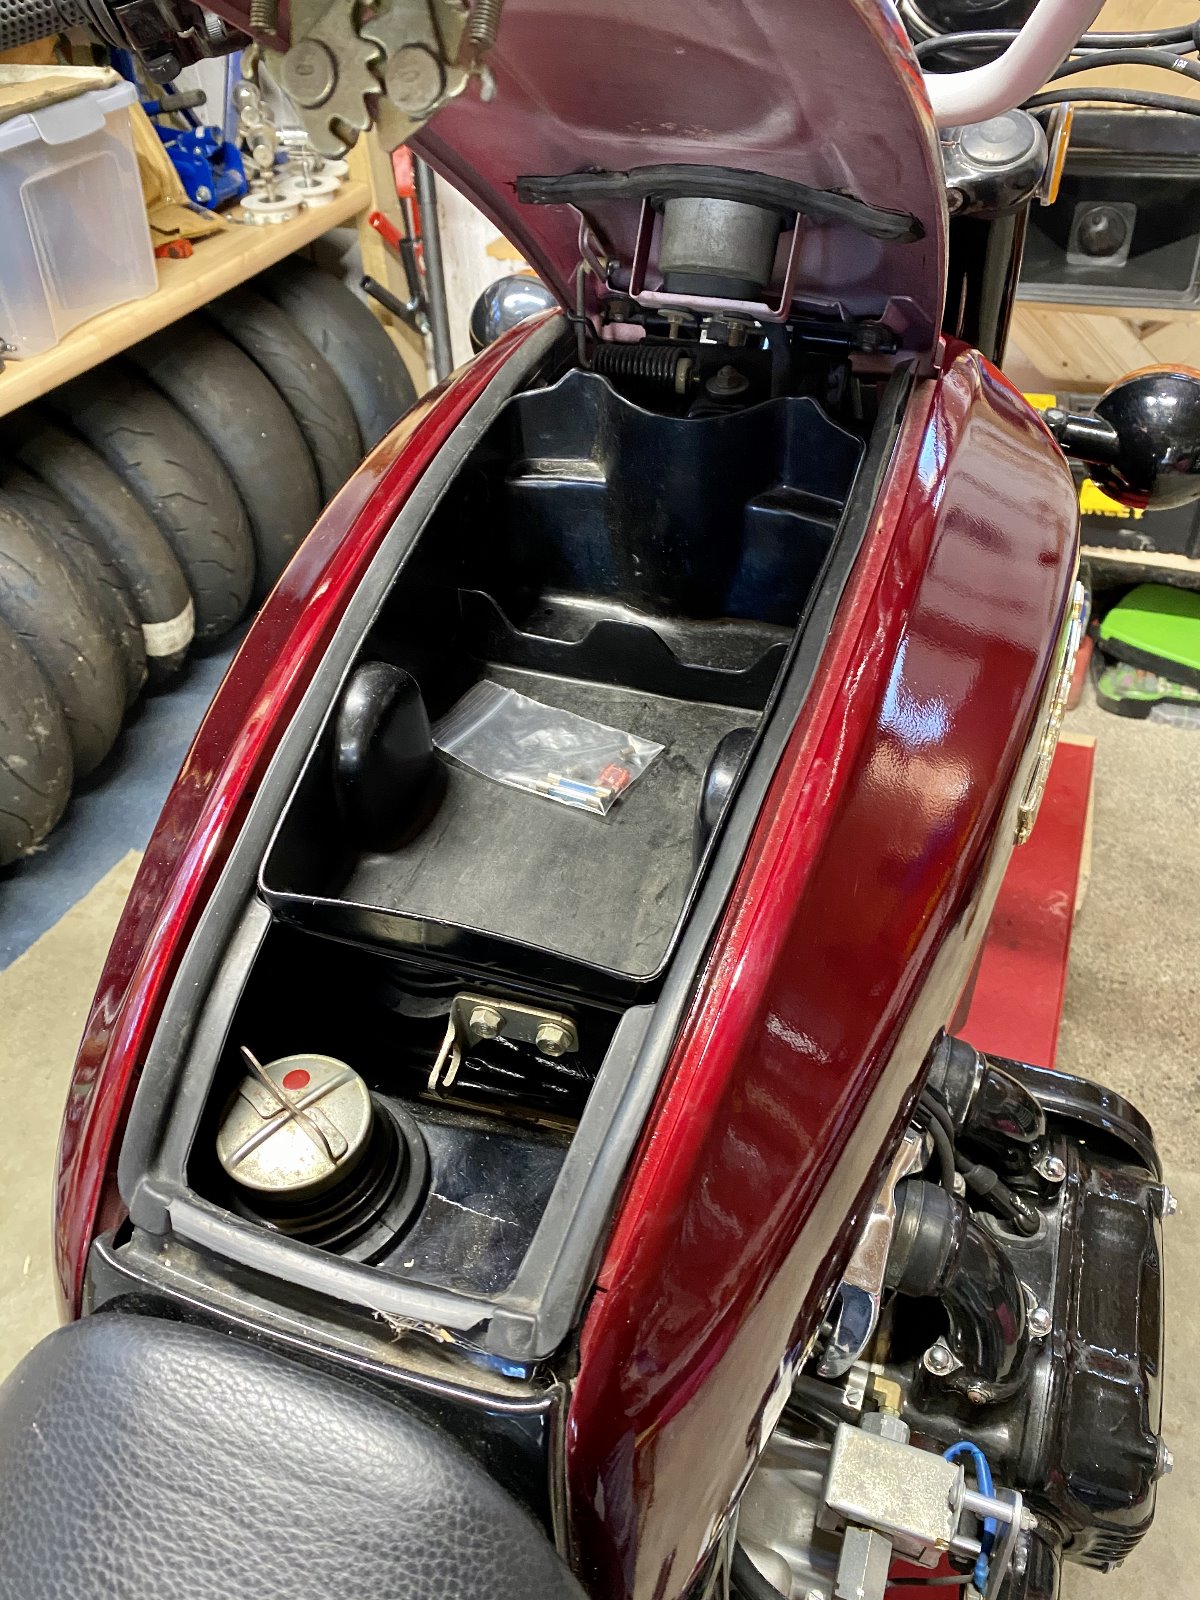
The false tank has a useful storage tray that will take a small tool roll, your wallet, your phone and a bottle fuel additive. Although the valve seats are hardened and the bike is fine with unleaded fuel I add a fuel stabiliser / ethanol inhibitor / other additives everytime I fill up to keep the bike running sweet. The fuel cap is visible at the back.

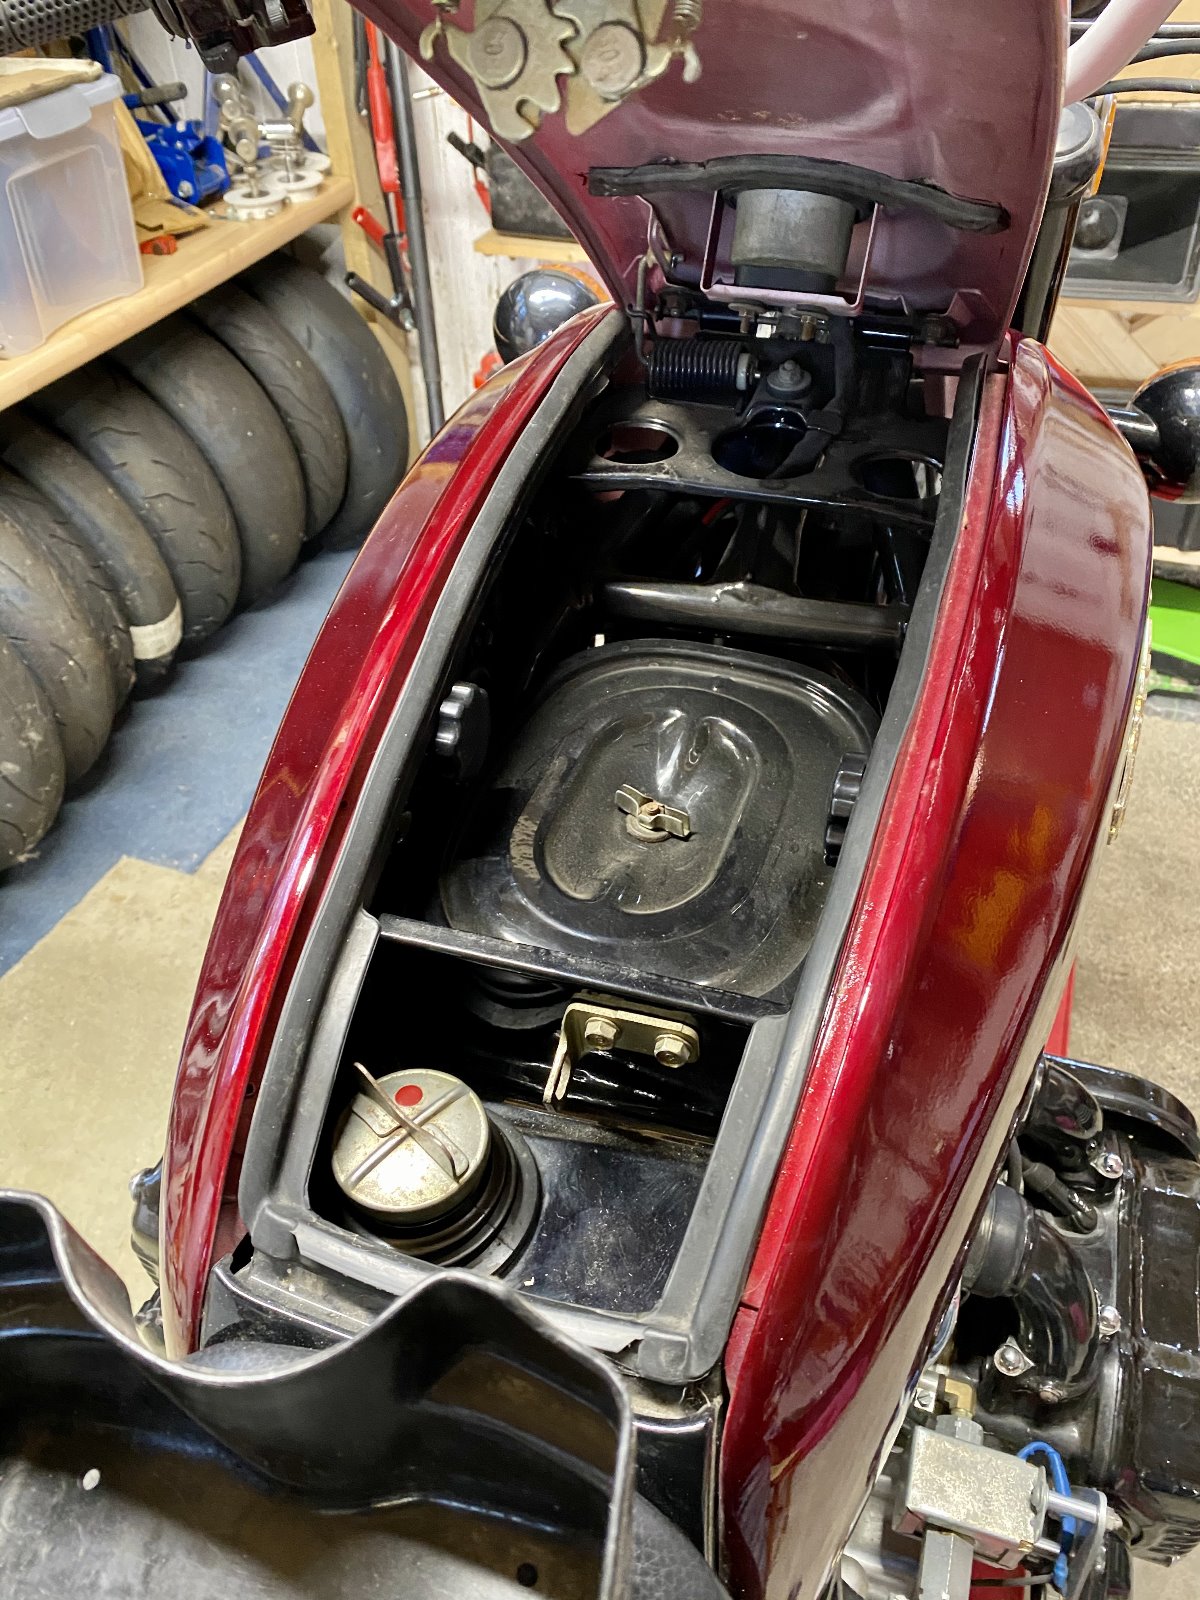
The storage tray lifts out to show the air filter holder. Either side there are 2 knurled knobs that release the side pods.

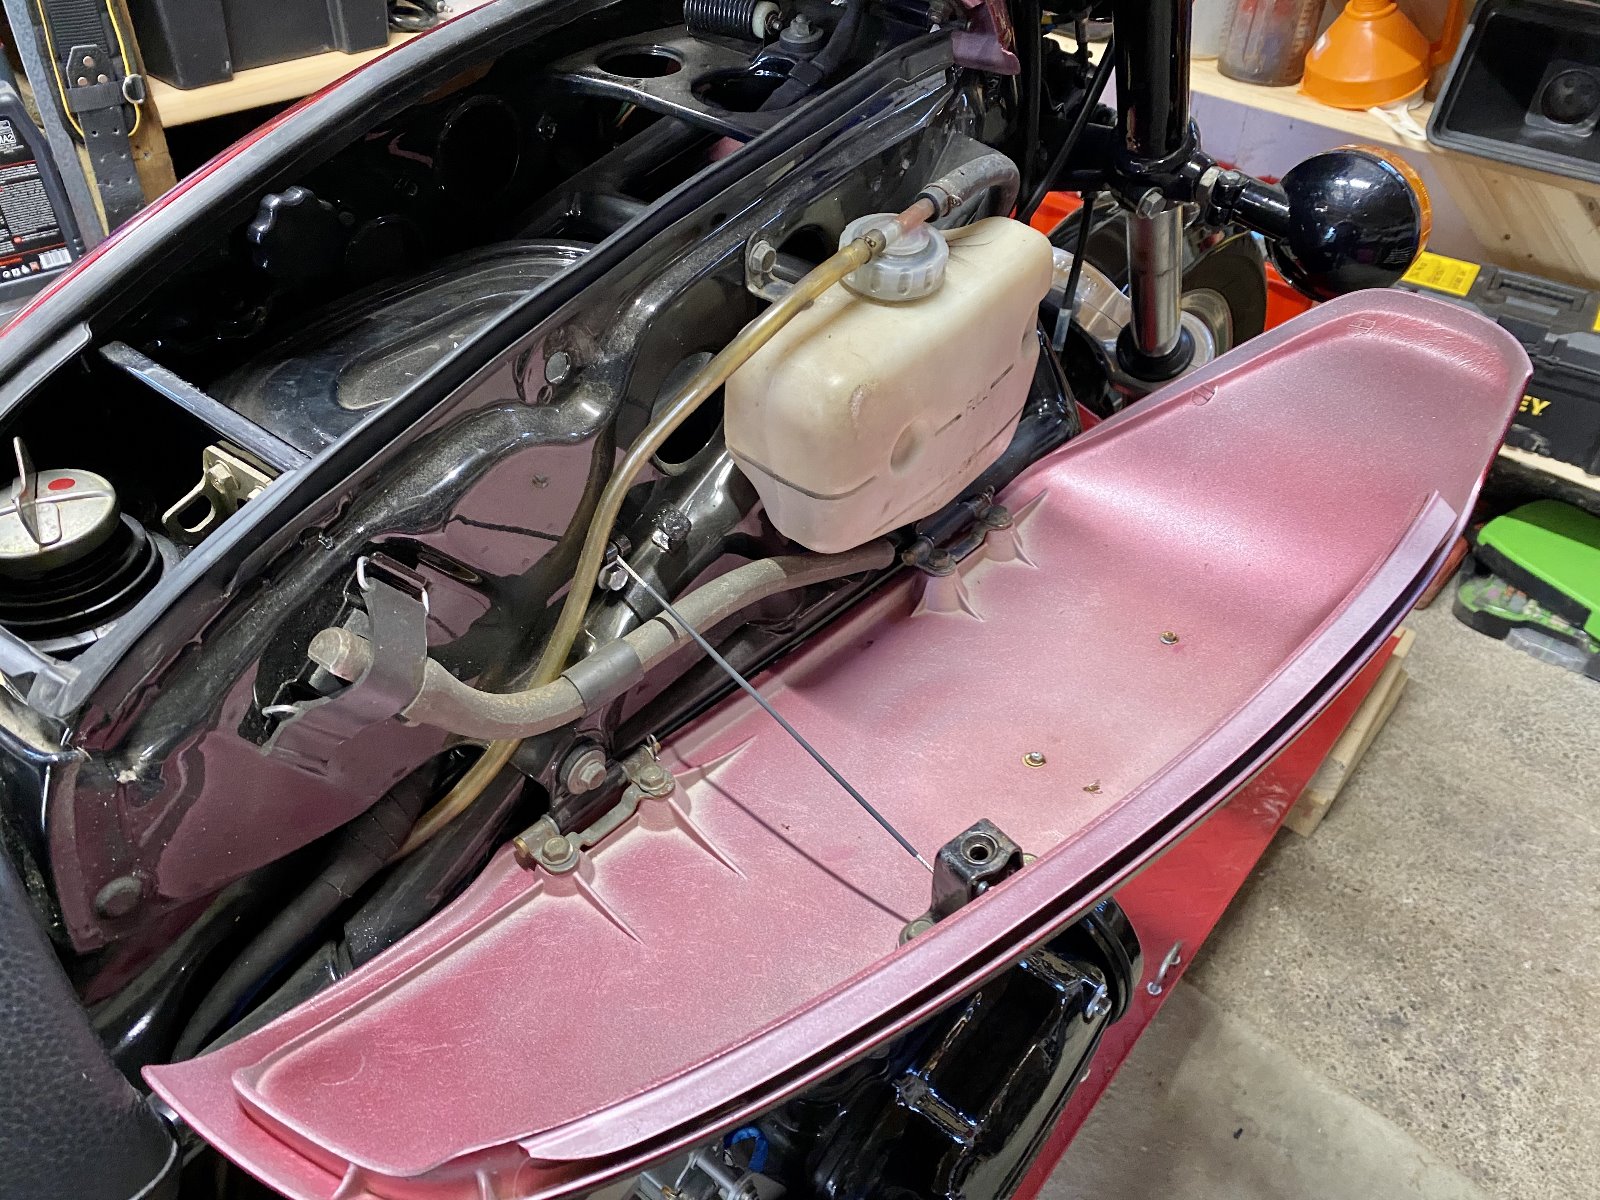
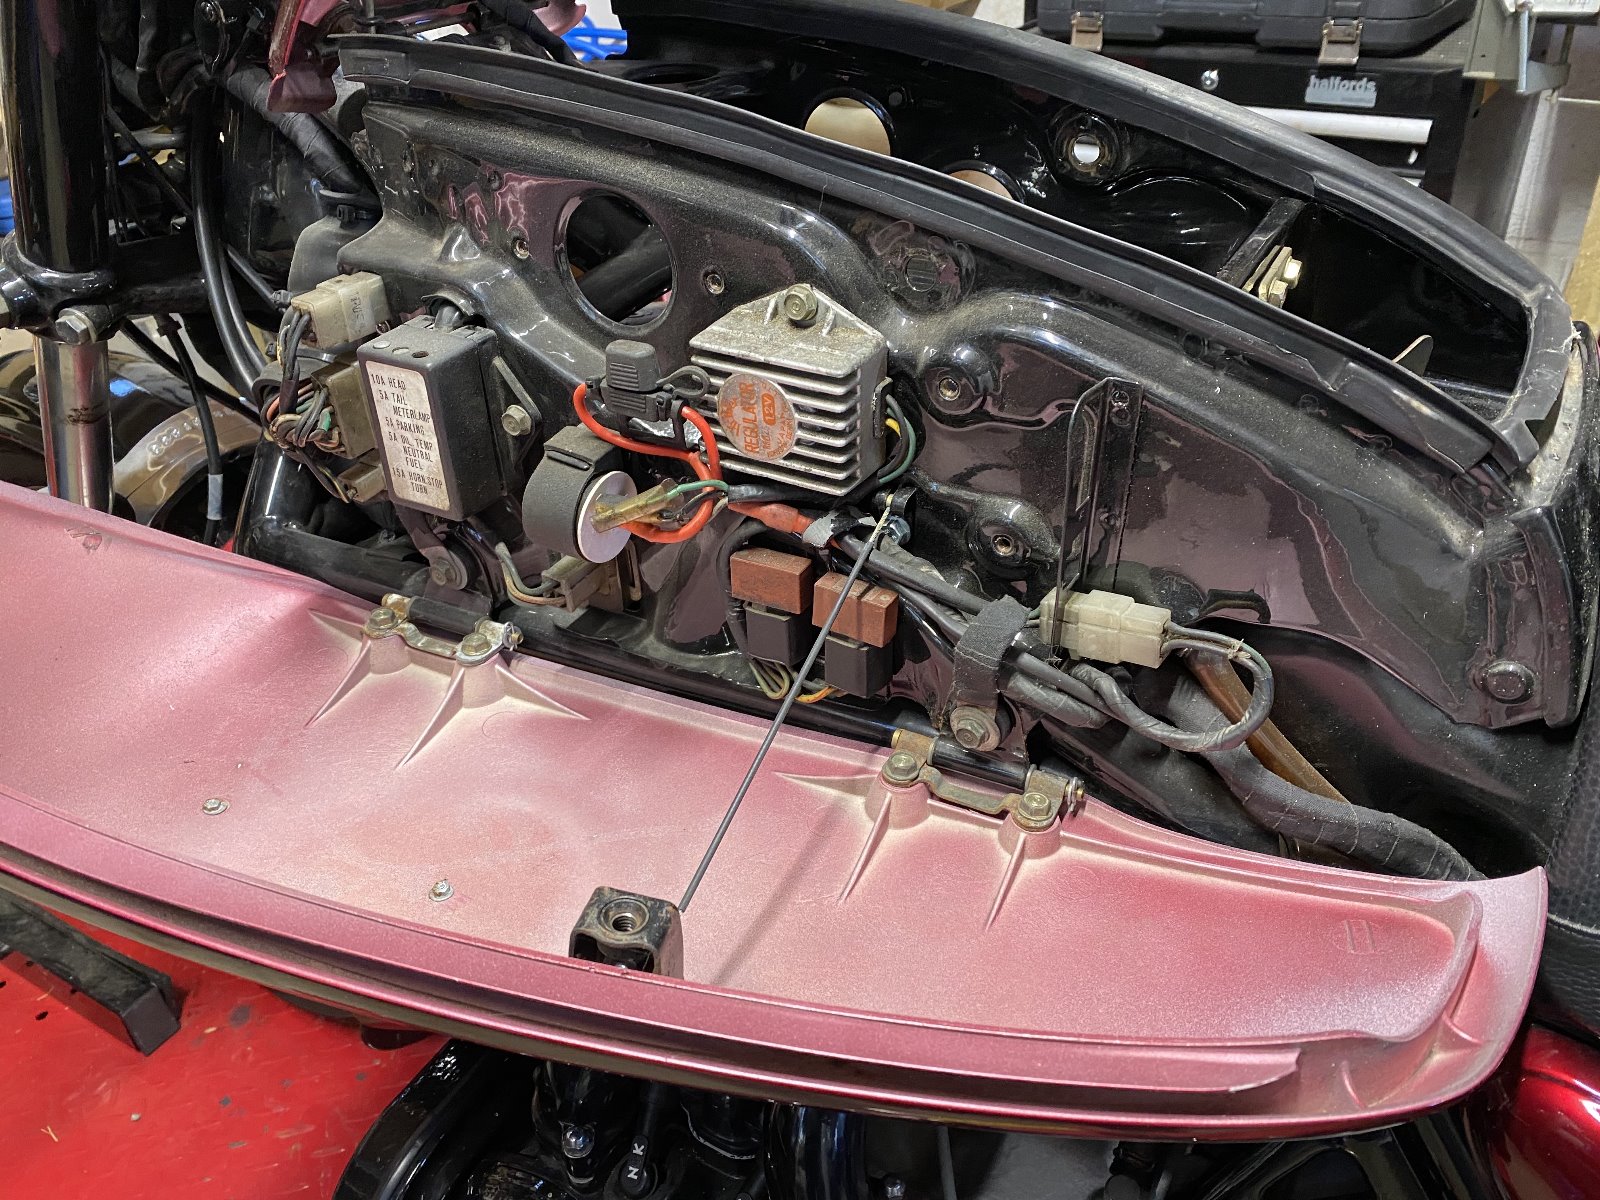
The right pod open showing the regulator, rectifiers and small fuse box. The modern in-line fuse holder is the power supply for the electric fuel pump. I keep a stock of replacement fuses in the storage tray - but have yet to have anything blow. I stripped the whole wiring harness back to its individual wires and rebound them but also ran 3 large earth wires through the harness. This was so that I didn't have to rely on earthing all the accessories through the frame - which would have required me to scrape through the powder coating to get a good earth connection - and would have exposed (old) metal!

So why am I selling? Especially as she is now MOT exempt and extremely cheap to insure. I have another bike project that requires financing and need the space in my shed. This Goldwing was a fantastic project and the engine is just so smooth. There aren't many GL1000s out there and none like this one. So she is rare, different and great fun to ride. I will be sad to see her go!
